
It is crucial to have a clear and defined navigation menu to help your visitors navigate easily through your WordPress site and get what they are looking for.
Whether you are creating a new website or working on an existing one, you should learn how to add and customize a navigation menu in WordPress to improve user experience and make your website look presentable.
By default, WordPress has a drag and drop menu interface that you can use to create header menu, menu with drop-down options and so on.
In this guide, we will help you to understand how you can create and add a navigation menu and customize it in WordPress.

What exactly is a Navigation Menu?
A Navigation menu is listing of important links displayed on your website.
These menus can contain links that point to pages, posts or categories on your site and even custom links to your social media profile or third-party sites.
The exact location of a menu depends on the theme that you are using but it is usually located in the header or footer areas. An organized menu bar not just guide your users but also help improve your WordPress SEO and search rankings.

You can add and customize menus and sub menus on WordPress very easily. Let’s quickly learn how to add custom navigation menu in WordPress.
Create a Custom Navigation Menu
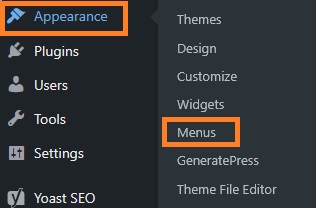
In order to create a custom navigation menu, First login to your WordPress admin dashboard. Then, Go to Appearance » Menus
Once you are in ‘Menus‘, click on ‘create a new menu‘

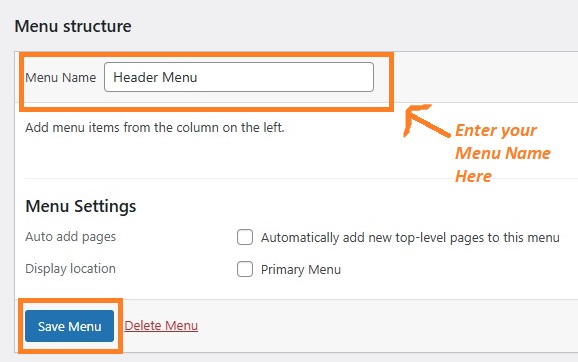
Now first of all, you need to name the menu you want to create and enter it in ‘Menu Name‘. For instance, i have given ‘Header Menu’ and then click on ‘Create Menu‘ button.
Now that a Menu is created, your menu area will expand into something like this.
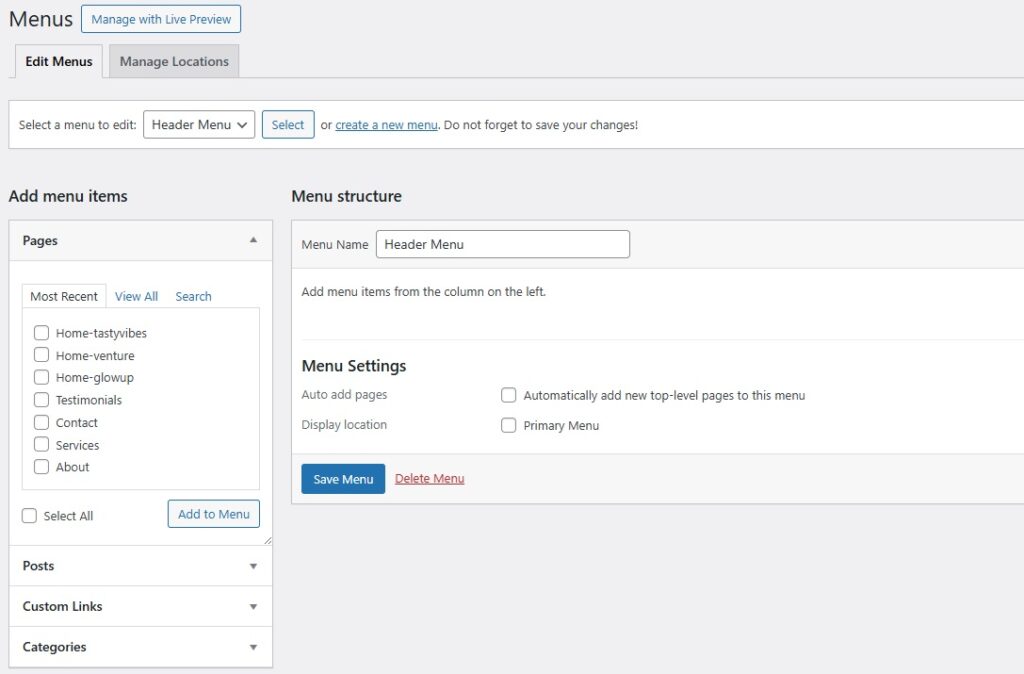
You can now start adding links you want to your newly created menu.
WordPress gives you total four options to add links to the new menus you create:
- Adding Pages
- Adding Posts
- Adding Custom Links
- Add Categories
Going Further, we will discuss How to Add a Page to the Menu, how to add custom links and categories to the navigation menu and How to create a drop down menu/ submenu.
Add Pages to Navigation Menu
You may want to add any page you have created to your navigation menu. Either you can choose specific pages from the column on the left or automatically add all new top level pages to be added to the menu.
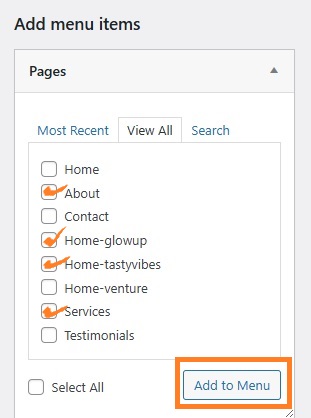
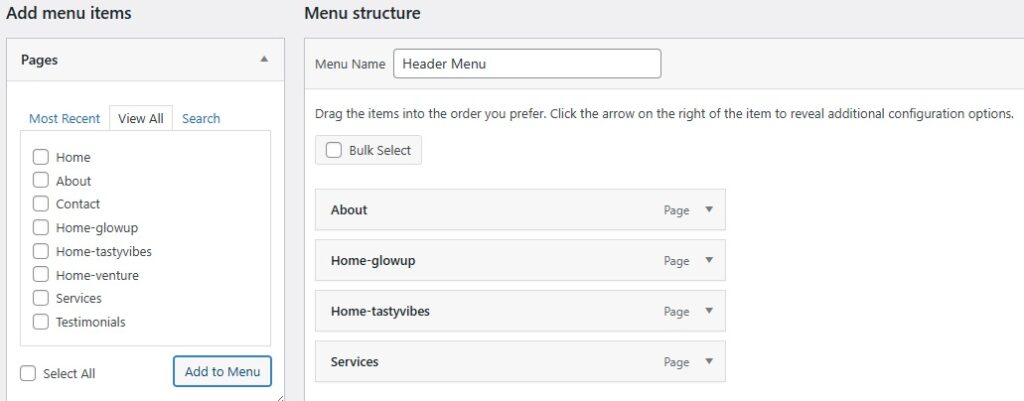
Under ‘Pages’ in ‘Add menu items‘, Click on ‘View All‘ tab to see all the pages you have on your site. Select the box next to page names you want to add to your menu, and then click on ‘Add to Menu‘ button.
Your pages are now added to the menu and will be shown on the right side under ‘Menu Structure’. You can put the pages into any order you prefer and rearrange them just by dragging and dropping the item.
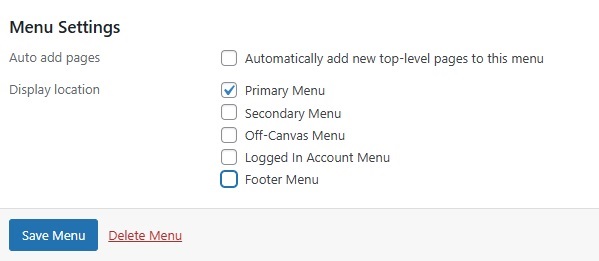
After Adding pages to the menu, just select the location where you want to display it and then click the ‘Save Menu‘ button.
Every theme is prebuilt with its own location options to put menus. I am using Astra in the given example, which has 5 different locations to set menu.
You can choose one or more than locations to set your menu.
The Menu i have took here as an example will look Like this.

Create Drop Down Menu in WordPress
Drop down menus or nested menu is a collection of secondary links that you get to see when you hover over or click on a certain menu item. These sub menus are really helpful in organizing links and avoid unnecessary clutter.
To create a drop down menu, just pick and drag an item below the parent item and then drag it a little to the right under ‘Menu structure‘. Please have a look at the example below; we have added ‘Testimonials’ and ‘Contact’ under Parent Item ‘Services’.
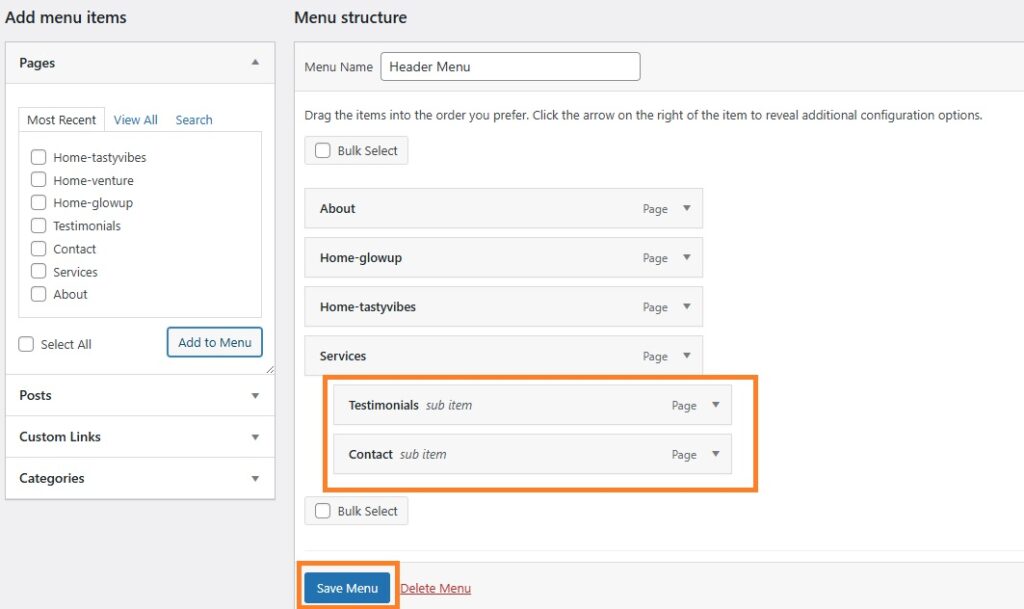
Once you’re done, click on ‘save menu’ button.
You can even add multiple layers of drop down menu to your menu where a sub menu can have its own sub menu as per your requirement. However, this will look a little cluttered and not many themes support multi layer menus.
Your Drop down menu will look something like this.

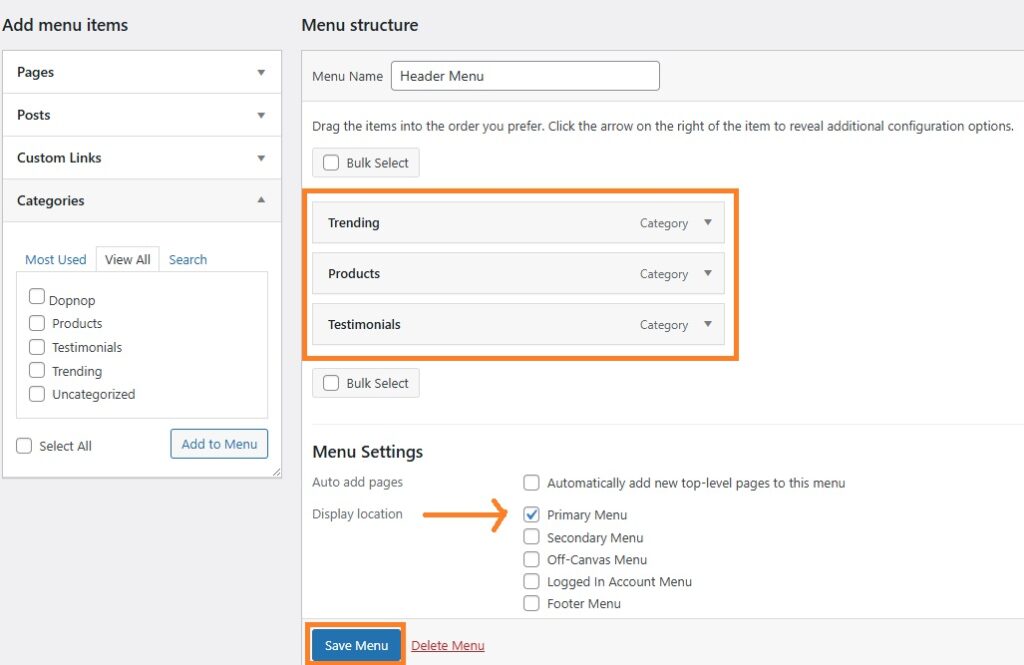
Add Categories to WordPress Menu
If you run a website or blog using WordPress, you may want to add categories to your navigation menu.
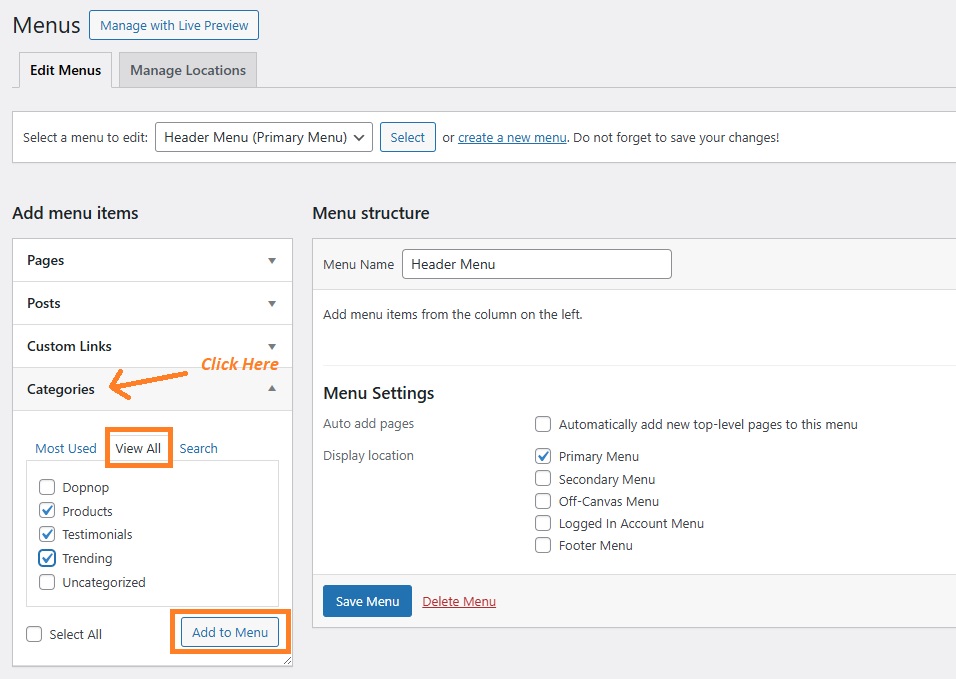
You can easily add categories on an edit menu page, just click on the ‘Categories‘ tab on the left, click on ‘View all’ to see all the categories exist on your site.
Now, select the categories you want to to add and finally click on ‘Add to menu’ button.
Doing that, the categories will now appear as your regular menu items on the right under ‘Menu Structure’. You can rearrange them and put in order you want by drag and drop feature.
Just hover over the item, the left will allow you to pick an item and releasing the left key will drop it.
Choose the display location where you want to place your menu under settings Then click on ‘Save Menu’ and you’re good to go.
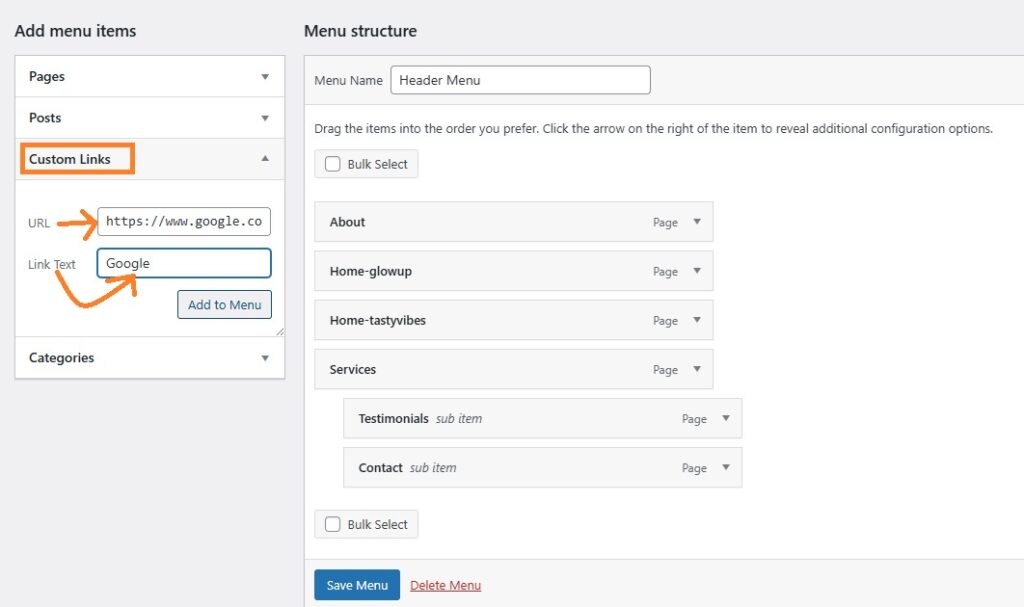
Adding Custom links to WordPress Menu
Apart from categories and pages, you can add custom links to your WordPress menu. You can easily add all the external links such as your social media profiles, reference websites or any other web page you would like to display on your menu.
Just click on the ‘Custom Links’ tab on left side of the menu screen.
Now, In the URL field, type the URL of the website that you want to add (https://www.google.com).
Next, type the name of the link that you want displayed in your menu in the ‘Link text‘ field (Google).
When you’re done, click on the ‘Add to Menu‘ button.
How to Edit or Remove an Item from the WordPress Menu?
WordPress by default uses the Page title or category name as Navigation label or link text when you add pages or categories to your blog menu.
You can change or edit this very easily, just click on the downward arrow of the menu item you want to edit.
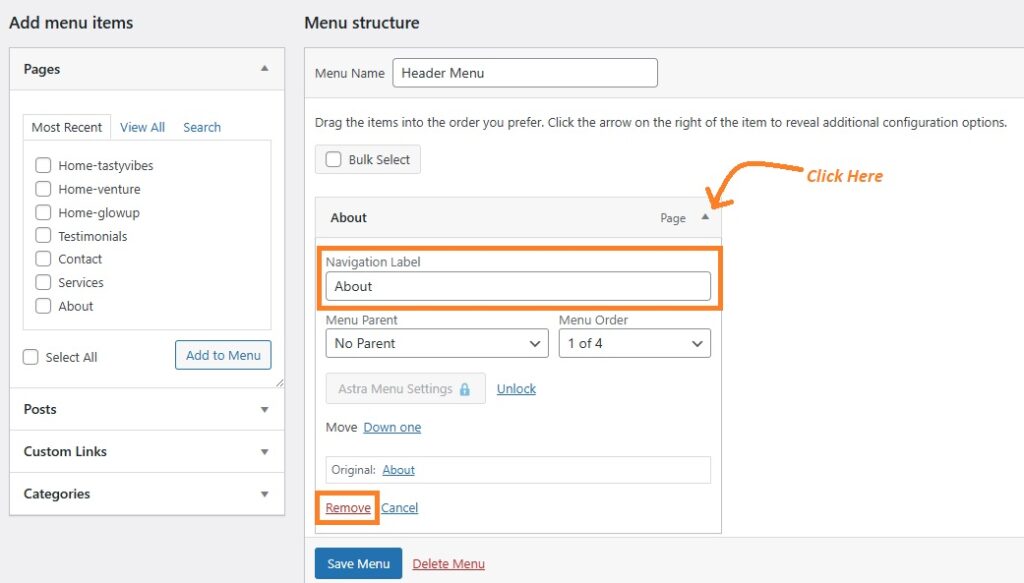
You can change the name or you can even delete the menu item from here.
Thank you for reading this article. We hope you’ve learnt how to add navigation menus on your website using WordPress. If you have any questions, please drop them in the comments section, we will be more than happy to help.