
Custom CSS allows WordPress owners to structure and design your site, giving them more control over how pages look. You can also add custom CSS to WordPress to change the layout and appearance of your WordPress site as well as the per-designed options.
If you are not using a child theme, you do not need to change the CSS in the parent theme as your changes will be removed when the theme is updated.
Today in this article we will learn how to add custom CSS in WordPress to design it specifically according to your needs.
Do we need to add Additional CSS ?
It depends on your need. If you are not satisfied with the layout, color or style of the WordPress theme you are using, you can give it a new look by adding custom CSS as per your requirement.
Custom Cascading Style Sheets (CSS) As the name suggests it allows you to design your site with more control over the appearance.
So let’s see how we can easily add additional custom CSS to WordPress.
1
Add Additional CSS Using Theme Customize
You might know that earlier there was no direct option to add custom CSS in WordPress but WordPress has given a new option to add additional CSS which has made it very easy.
And you can do all this right from the WordPress admin area and there is no need to go anywhere else or edit any theme file.
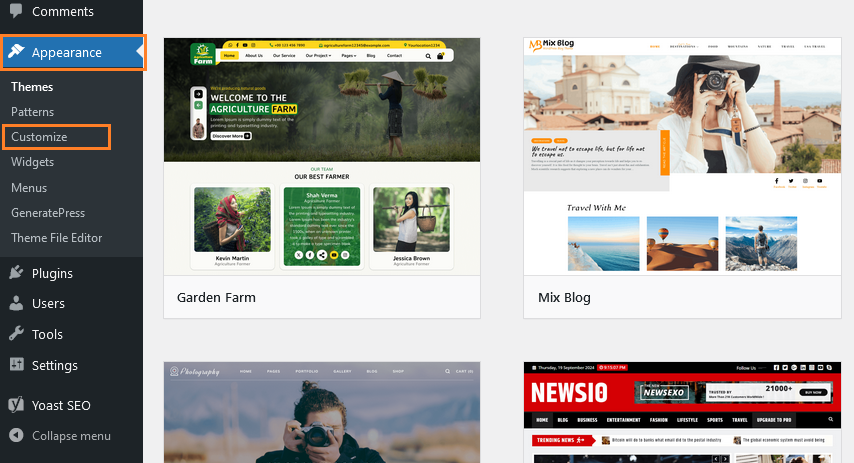
So first of all, you need to go to the ‘Appearance » Customize’ page from your WordPress dashboard. Most themes have built-in sections that allow the user to add CSS from the “Customize” area in WordPress.
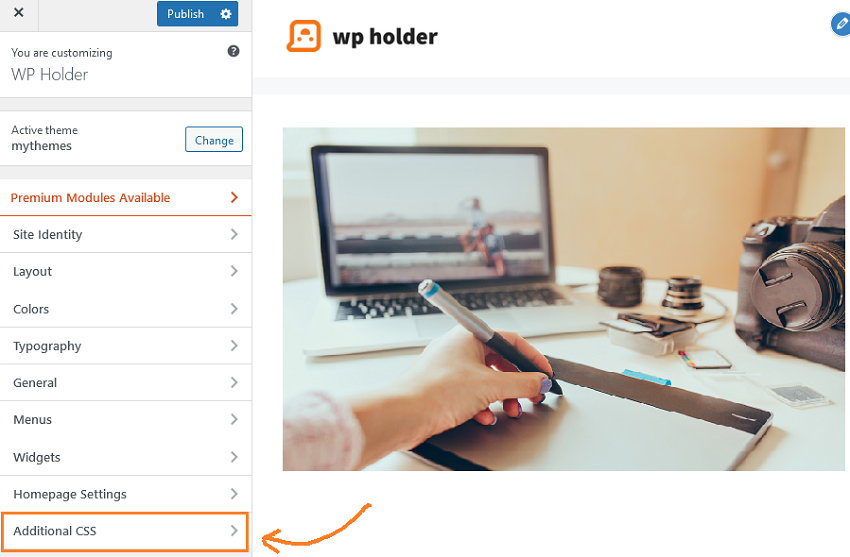
After clicking “Customize”, the WordPress customize will open customizer Screen. Scroll down a bit and click on the “Additional CSS” option.
This will open a CSS editor. Here you can add your own custom CSS code, you can see it applied instantly on your website’s live preview panel.
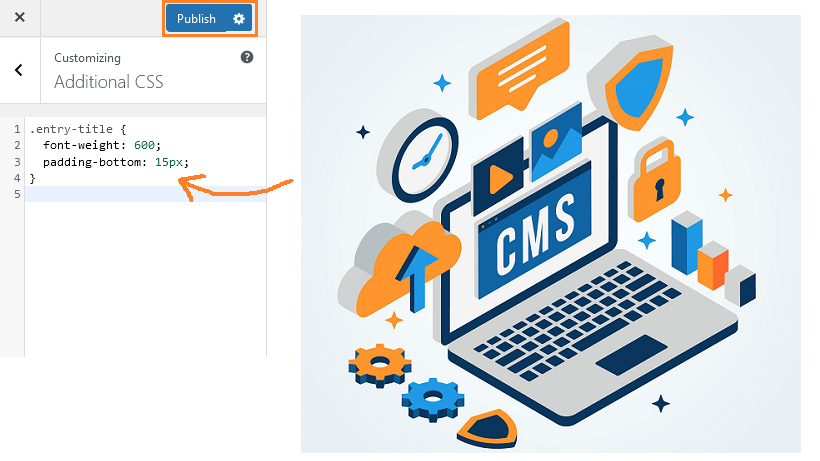
After adding the CSS rules just click on the “Publish” button when you want the changes to reflect.
Note : Keep in mind that these changes that you have made are only for the current active theme. If you want to change the theme, first copy this code and then after activating another theme, paste this code again in custom CSS and save it.
2
Add Custom CSS In WordPress Using Plugin
The first method doesn’t work for you? Or your theme doesn’t have additional CSS options available, or for some other reason you are unable to add custom CSS, don’t worry, you can add custom CSS using a plugin as well.
So firstly we will install and activate the plugin, Go to ‘Plugins » Add New Plugin‘ now Search ‘WPCode’ in Search box and click on install and activate the plugin. See our guide on how to install a WordPress plugin
After activation, now go to Code Snippets » Add Snippet from the WordPress admin dashboard.
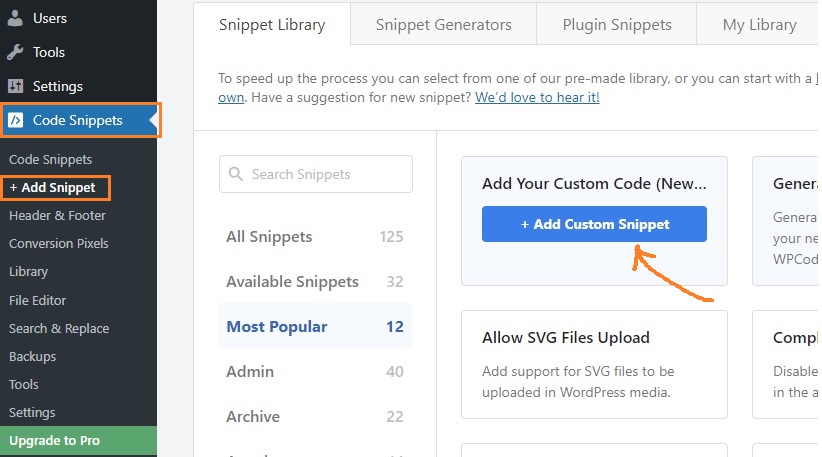
The + Add Custom Snippet button appears as you hover over Add Custom Code (New Snippet), Now you have to click on that button.
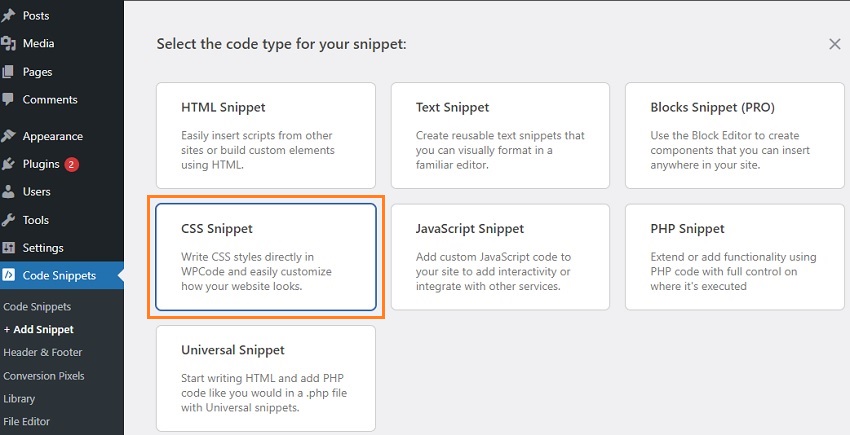
Select the code type for your snippet, here we are going to select CSS snippet because we have to add custom CSS code.
You can add a title to your snippet to remember what it’s about, Now ‘Add your CSS Code’ into the ‘Code Preview’ box
If you want to execute the code on your entire WordPress site, scroll down to the ‘Insert’ section and choose the ‘Auto-insert’ method.
Choose the ‘[/] Shortcode’ method If you only want to execute the code on certain pages or posts
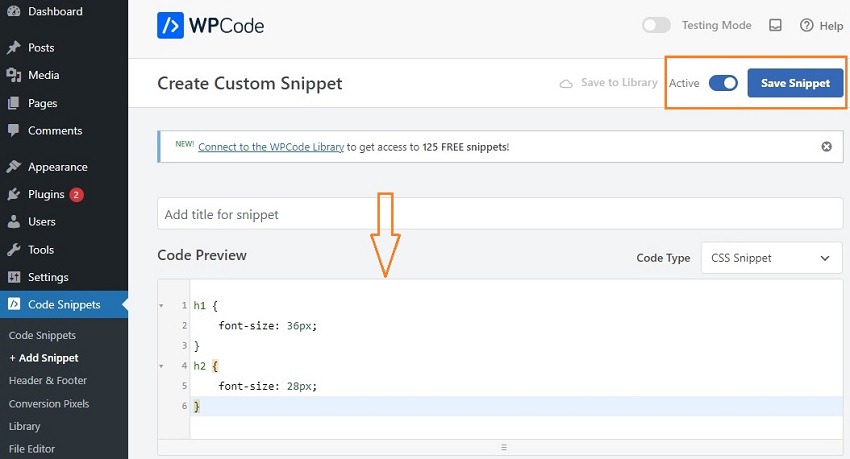
Now just activate the ‘Active’ button and click on ‘Save Snippet’ button. It’s done.
Thank you very much for reading this article. I hope I was able to help you. Still, if you have any questions, please tell us in the comment box.
Read More : How to Remove WordPress Post Revision
