
Google Search Console (Google Webmaster Tool) is actually the number one SEO tool every website owner should use to measure their site’s search traffic and performance, fix issues, and rank their site in Google search results. So let’s Submit To Google Your Website.
Today in this article we will learn how to add your WordPress website to Google Search Console Step by Step so that it appears in Google search results.
Go Ahead,

Why to Use Google Search Console ?
Simply put, Submit To Google Your Website (Google Search Console) is a free service provided by Google that helps you monitor, maintain, and troubleshoot your website’s presence in Google Search results.
Search Console provides tools and reports :
- Performance of Site
- URL Inspections
- Indexing – Pages, Sitemap, Removals
- Enhancement – breadcrumbs, Site-links Search-box
- Security and manual actions
It’s not easy to describe Google Search Console in these few words, to get access to all these tools and reports, let’s add your WordPress website to Google Search Console.
Add WordPress Site to Google Search Console
Submit To Google Your Website First of all you have to visit the Google Search Console website and click on the ‘Start Now’ button.
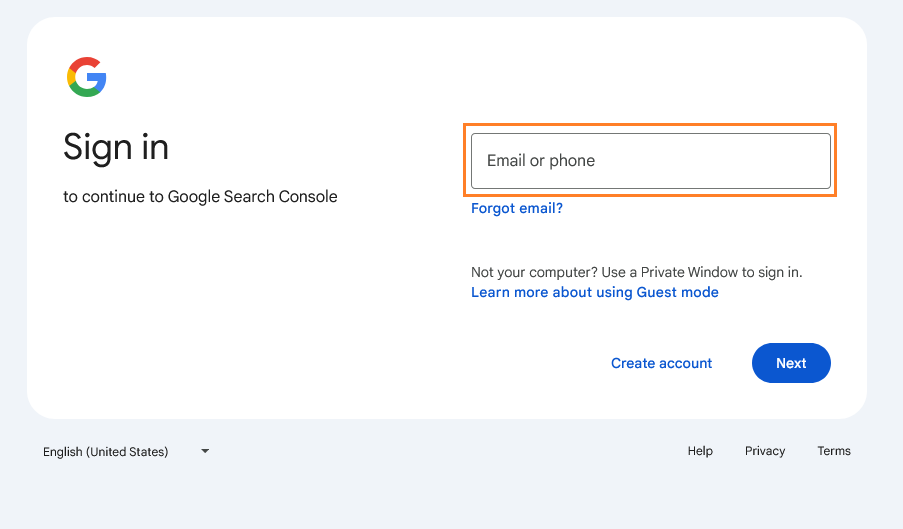
Now to continue to Google Search Console ‘Sign In’ with your Google account, enter the email and click on ‘Next button’ if you don’t have a Gmail account then create one.
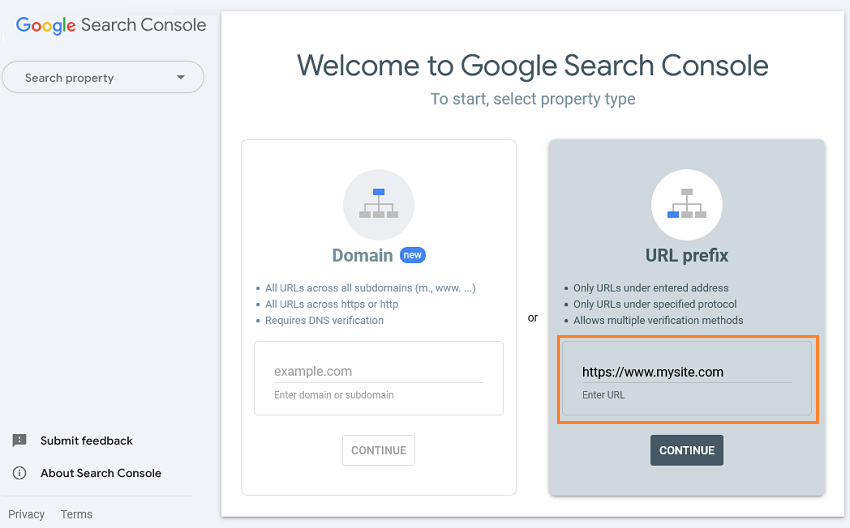
Once Successfully login, a welcome message screen will open. Here you have to add your property type. As you can see there are two options here, Domain and URL Prefix, It would be better if we use URL prefix method.
Go ahead, Submit To Google Your Website enter your site’s URL in the URL Prefix box (Enter the URL with prex https://)
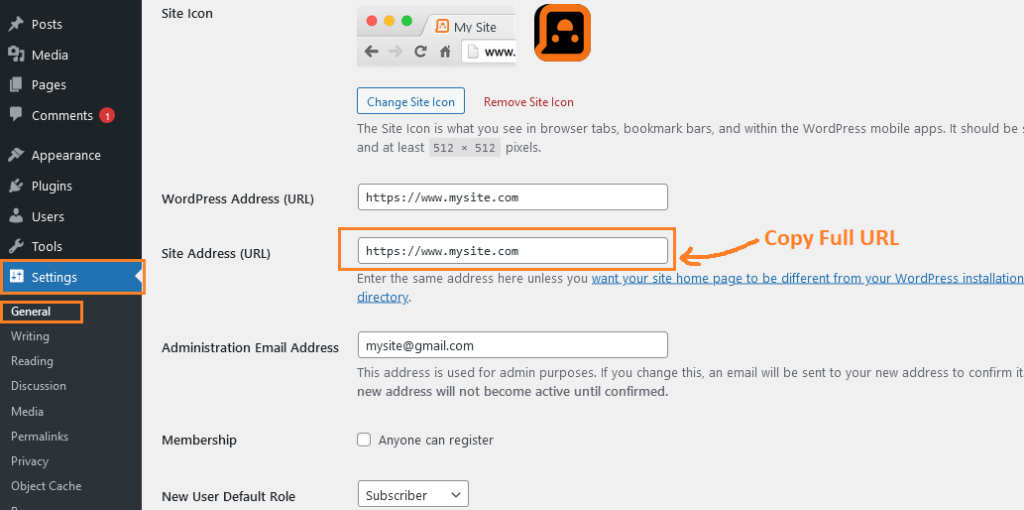
If you are confused whether to add HTTPS URL or without, then copy your website URL directly from the WordPress control panel and paste it directly here.
To copy your URL, Go to Settings » General and Copy Site Address URL, Once copied just paste it in the box above and click on ‘Continue’ button to proceed to the next step.
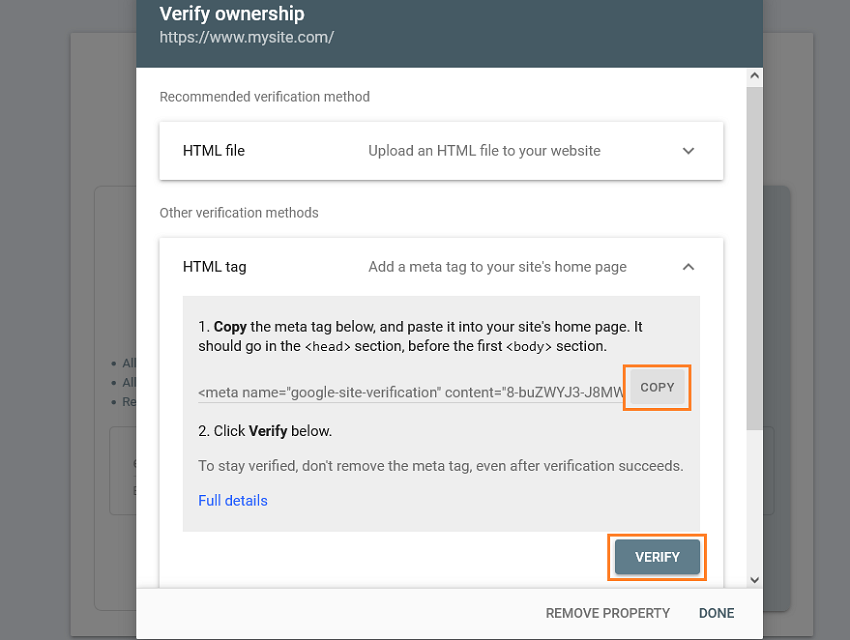
Now verify ownership of your website The recommended verification method is an HTML file that we can download directly and verify by uploading it to the root directory of our website.
But here we will verify the website using the ‘HTML tag’ method. First, Copy the HTML tag.
Submit To Google Your Website using Yoast SEO plugin
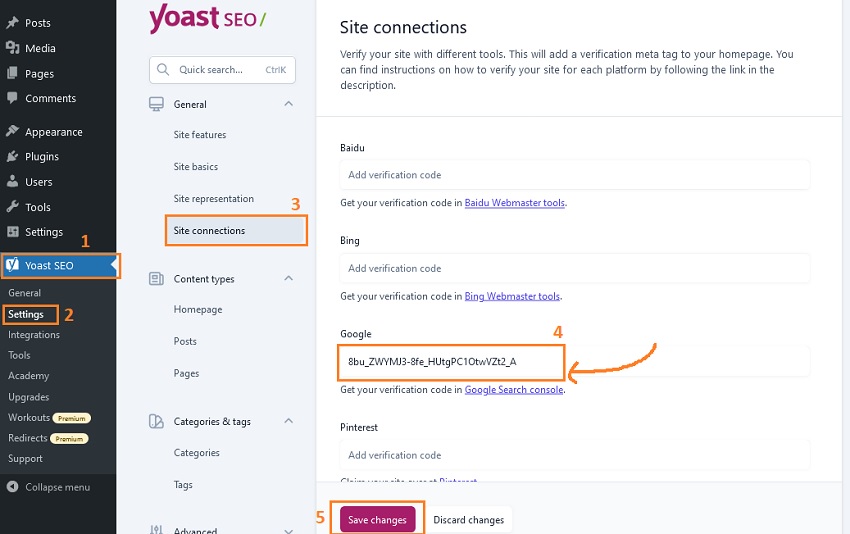
We are doing ownership verification using Yoast SEO plugin, now go to Yoast SEO » Settings » Site Connections.
Paste the code copied from Google Search Console in the “Google Verification Code” box and then click on Save Change button.
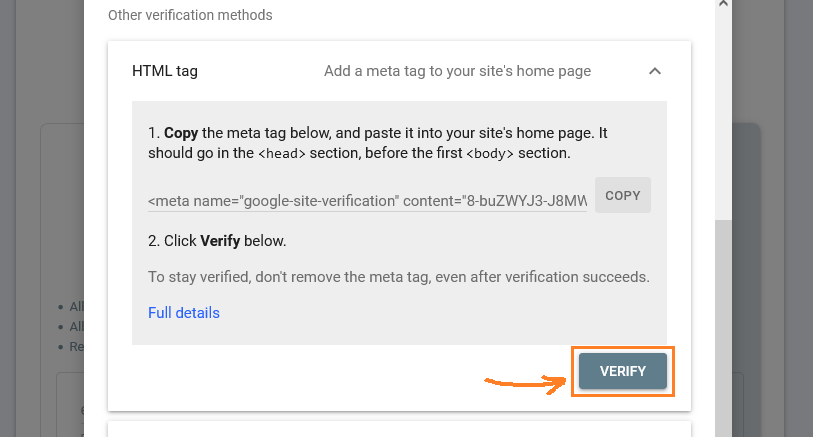
After pasting the HTML tags, return back to the Search Console verification page and now simply click on the ‘Verify’ button to complete the verification process.
Once you click the Verify button, Google will verify the HTML tags you added to your website, and display the ‘Ownership Verified’ message.
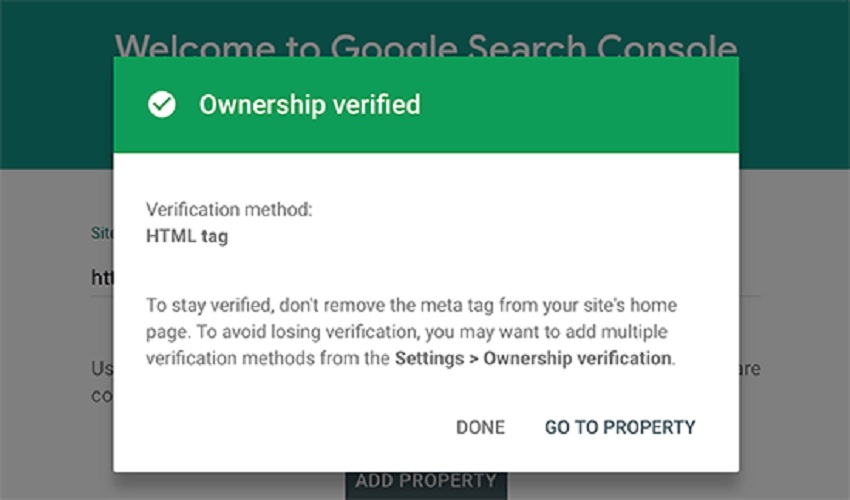
Remember: If you failed to verify please clear your WordPress cache, hope it will help to get verified.
Not Using Yoast SEO ? If you are using below plugin then verification process would be as follow
Verify Search Console Ownership Using All in One SEO
If you are using the All in One plugin instead of Yoast, then the verification will be like this
Go to ‘All in One SEO » General Settings » Go to Webmaster Tools‘ page and click on “Google Search Console” Then paste the code in the “Google Verification Code” box and click on the ‘Save Changes’ button.
Rank Math Plugin Search Console Verification
Here is what to do if you are using Rank Math SEO Plugin
From WordPress Admin Panel Go to ”Rank Math » General Settings » Webmaster Tools” now paste the verification code into the field next to ‘Google Search Console’
The website has been successfully added to Search Console and the verification process is also completed. Let’s move ahead now.
Add sitemap to Google Search Console – Submit To Google Your Website
Through sitemap, we provide Google a bundle of our website files which are in XML format so that Google can easily crawl the links and show them in Google search result.
So let’s know step by step how to add XML sitemap in Google Search Console.
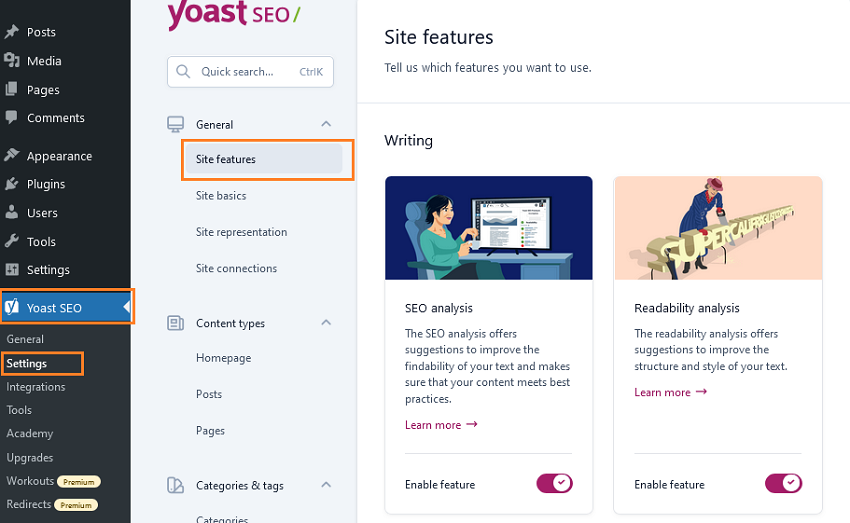
To find your website’s sitemap link, Go to ‘Yoast SEO » Settings » Site Features’ from the WordPress admin panel.
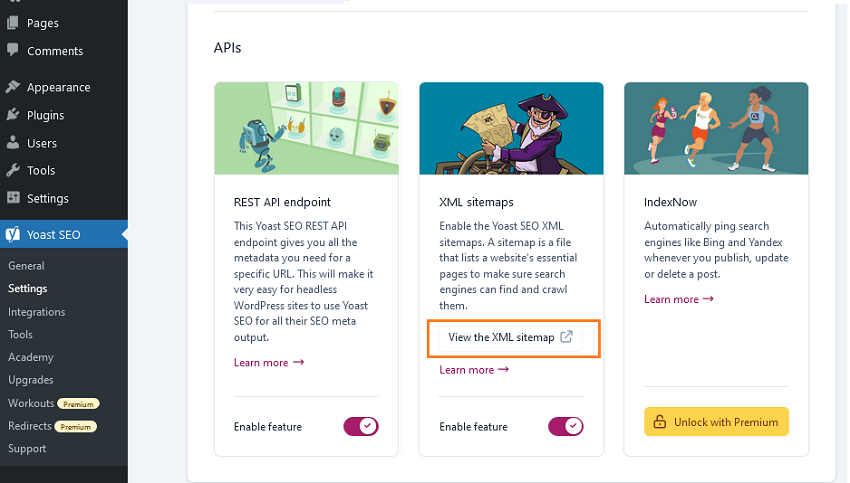
Scroll down to APIs, Now click on ‘View the XML sitemap’ make sure enable feature is turned on as shown in the below screenshot.
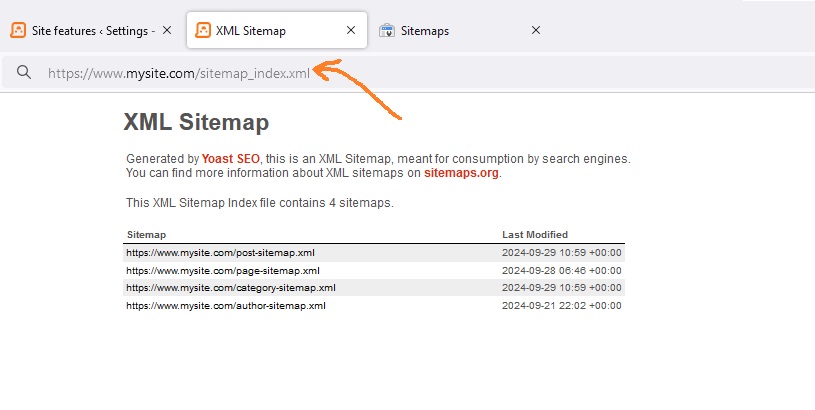
The sitemap link will open in a new window From here, you can copy the URL from your browser’s address bar.
Now go back to Google Search Console, select Property from drop down menu and click on Sitemap from the left menu, now paste the last part of your sitemap link sitemap_index.xml and click on Submit button.
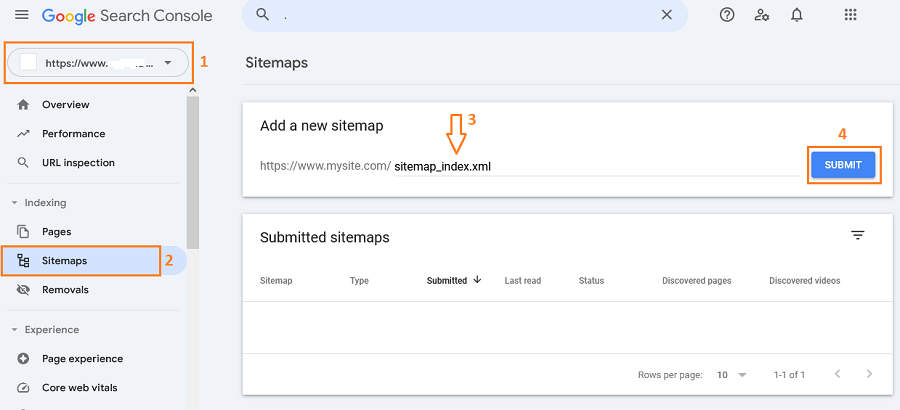
The sitemap has been submitted successfully. Now Google will periodically crawl the sitemap to index the posts and pages in Google search.
You should visit Google Search Console on a daily basis to keep an eye on the performance reports and crawl errors etc so that you can take action accordingly.
Read More : How to Add Custom CSS to WordPress