Are you aware that on WordPress you can schedule your posts to be published in the Future? Yes, WordPress can schedule posts for future publication. But Sometimes, This handy feature is a bit hidden for beginners to schedule WordPress post.
When you know how to schedule your posts, you don’t have to worry about publishing articles at a particular time. After you finish writing, you can schedule a publishing date and time of your choice.
In this article, we will guide you on how to schedule WordPress posts easily with Steps. And, Why and How you can use this feature to get the most out of it.

Why to Schedule Posts in WordPress?
The best strategy to create a successful blog is to plan your editorials and publish articles regularly. This is where post scheduling comes into play.
You can write your articles at your own pace. And when you are done writing, you can Schedule WordPress Post to be published at a date and time of your choice.
Another benefit of scheduled posts is to take advantage of peak traffic hours. Every website has certain times of the day when it has the most users. By posting at these times, you can take advantage of your existing traffic and increase your page views.
Scheduling posts around holidays can also be helpful. You can easily plan your blog posts and enjoy your vacation without having to worry about creating and publishing content.
Now that we know the benefits it offers, let’s see how to schedule blog posts in WordPress.
1
How to Schedule a Posts in WordPress
Schedule WordPress post is a great idea if you know how to do it. The schedule blog post feature is quite hard to find for beginners.
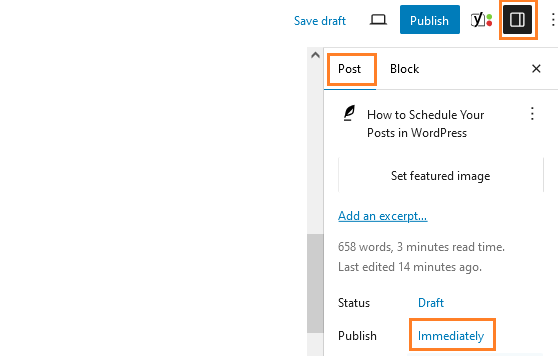
Once you’ve finished creating and editing your blog post, check under the ‘Setting’ tab in the right-hand column of the Edit Screen.
In the “Status and Visibility” panel, you need to click on the “Immediately” option next to the “Publish” Option given on your panel.
Now, You will see an Option to ‘Pick a Date and Time‘. Simply, select the suitable date and time you want to publish your post on.
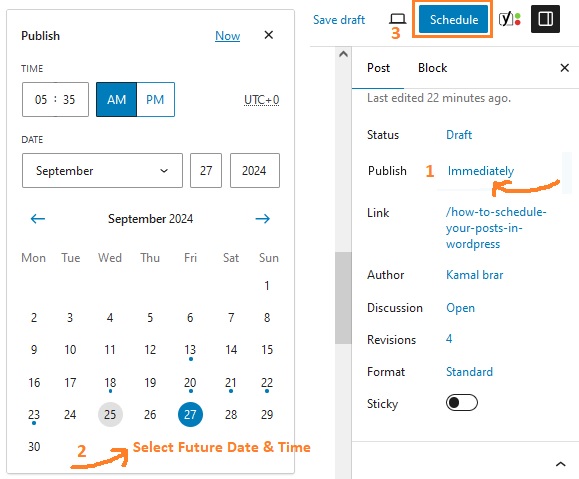
You can Schedule your post in the future easily by selecting a future date and time. You can even put your WordPress post in the backdate by just choosing a past date and time using the same feature.
If you opt for a future date and time, you will see that the publish icon will change to ‘Schedule..’. Now, just click on the ”Schedule” button and WordPress will schedule the post for you.
The Posts that are scheduled using this feature will be published on the selected date and time automatically.
2
How do you Schedule WordPress Posts in Classic Editor
If you are currently using the classic WordPress editor, we suggest that you upgrade to the new WordPress editor called Gutenberg.
The new WordPress editor is super fast and will help you create better content on your blog. But, if you want to continue using the old classic editor, here is how to schedule posts in WordPress.
When you are done writing your post, see under the “Publish” box in the right column of the editing screen and click the “Edit” link next to the “Publish Immediately” option over there.
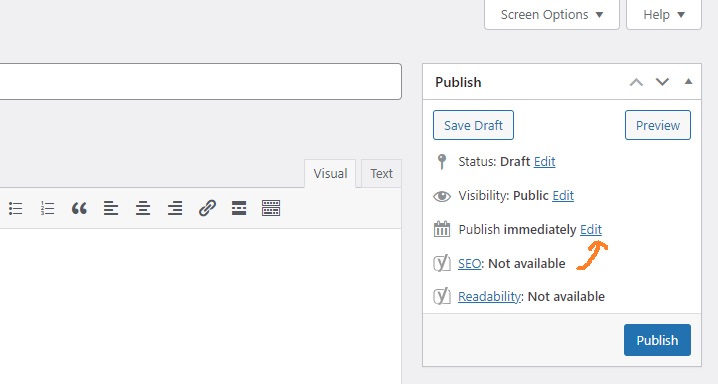
The Date and Time option will appear on the screen. Now, select the date and time you want to publish this post and click on ‘OK’ button.
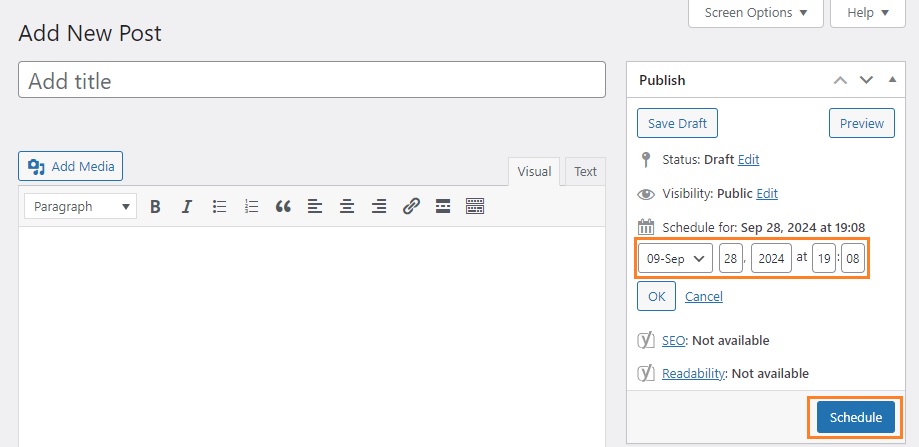
Doing this, The blue ‘Publish’ button will change to ‘Schedule’. Finally, click on the ‘Schedule‘ button to save your changes. Now, WordPress will publish your post on the given date and time automatically on your behalf.
We hope you have learned how to easily schedule your blog posts in WordPress and why it is important, with the help of the above article. If you have any questions, Feel free to ask in the comments below.
3
Schedule Posts from Quick edit
A great Quick feature of WordPress is that you can schedule your posts to go live whenever you want. You can schedule a post that has already been published or you can schedule a drafted post..
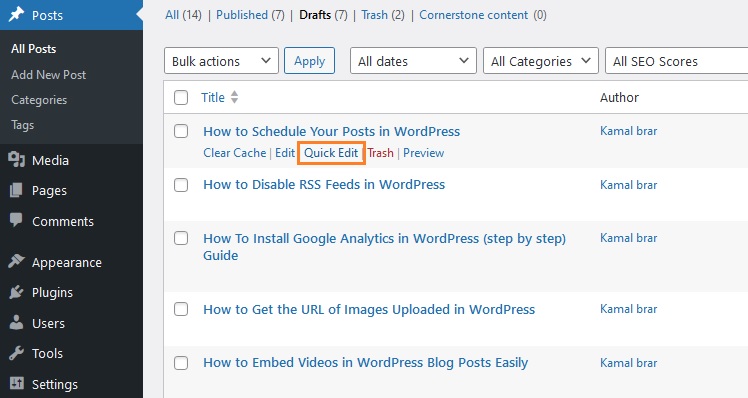
Go to All Posts, hover over the post you want to schedule to get the quick edit option, then click on ‘Quick Edit’
When you click on ‘Quick Edit’ you open the scheduling options, First of all, select the published option from the drop down menu next to the ‘Status’
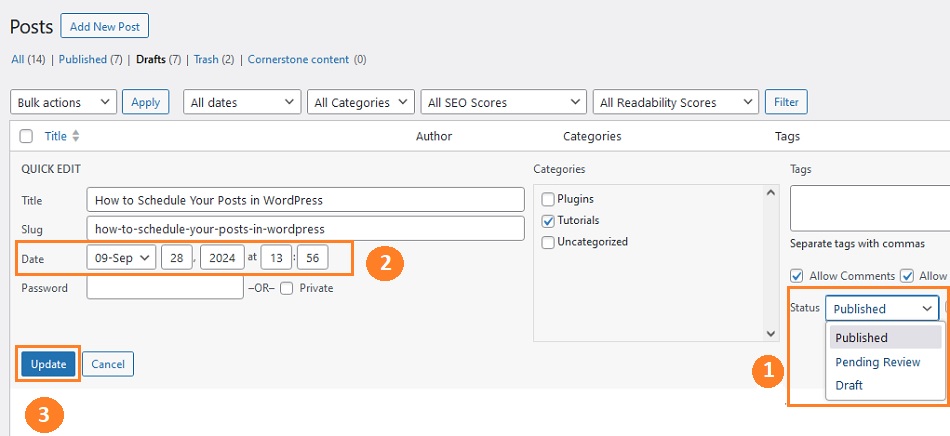
You can now ‘Set the date and Time’ when your post will go live. Click ‘Update’ when you are done
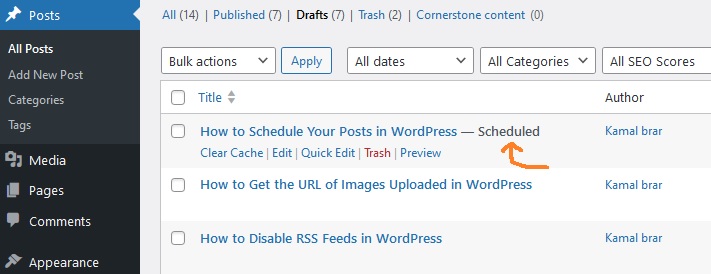
Notice scheduled next to Post you just edited, Now instead of going live immediately, your scheduled posts will automatically go live at the date and time you choose.
Thank you very much for reading this article, I hope it will be easier for you to schedule posts.
Also Read: How To Remove WordPress Comment URL