
Do you want to know how to add table of contents in WordPress?
A table of contents helps your WordPress readers understand what your post is about before they start reading.
If you want your WordPress readers to quickly find the answers they’re looking for without having to scroll through the entire article, a table of contents helps them jump to the relevant section with just one click.
This guide will show you an easy ways to create and customize a table of contents, so you can save time and focus on writing great content.

Why add a table of contents to WordPress articles?
Adding a table of contents in WordPress posts and pages is not only essential for user experience but also crucial for search engine optimization (SEO). You’ve probably noticed many times that when you search for something on Google, some links appear below the search results.

As you can see in the snippets, Google can use the table of contents to automatically add a “Jump to section” link below the search result.
But keep in mind that Google doesn’t necessarily show a table of contents below google search results every time.
May appear in featured snippets also.
How to add Table of Contents in WordPress
There are several solutions that offer an easy way to add a WordPress table of contents to WordPress posts. we will cover a few of them in this post below.
Method 1: Add Table of Contents Using Plugins
Plugins are tools that help make a WordPress website better and more useful. Some plugins can easily add a table of contents to your posts, which helps readers find information faster.
One plugin we really like is called Easy Table of Contents. It is simple to use and works very well for organizing your content.
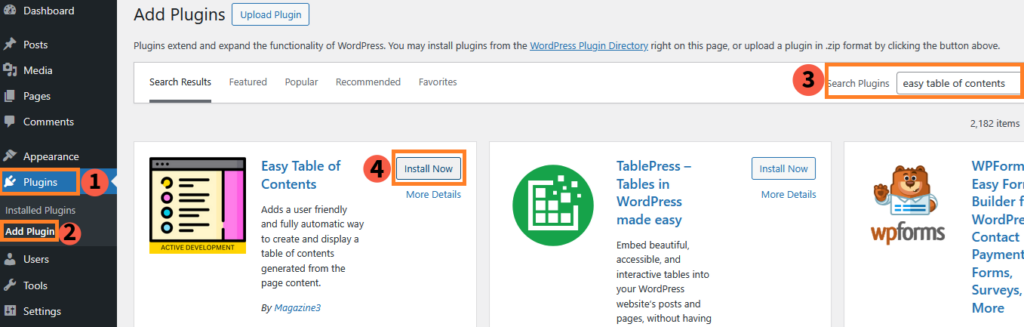
The first thing you need to do is install and activate the Easy Table of Contents plugin, go to plugins » add new plugins search Easy Table of Contents click on install and activate.
After adding Easy Table of Contents plugin, all you have to do is go to Settings » Table of Contents from your WordPress dashboard and insure posts and pages are check.
Now, a table of contents will automatically appear on all your posts and pages.
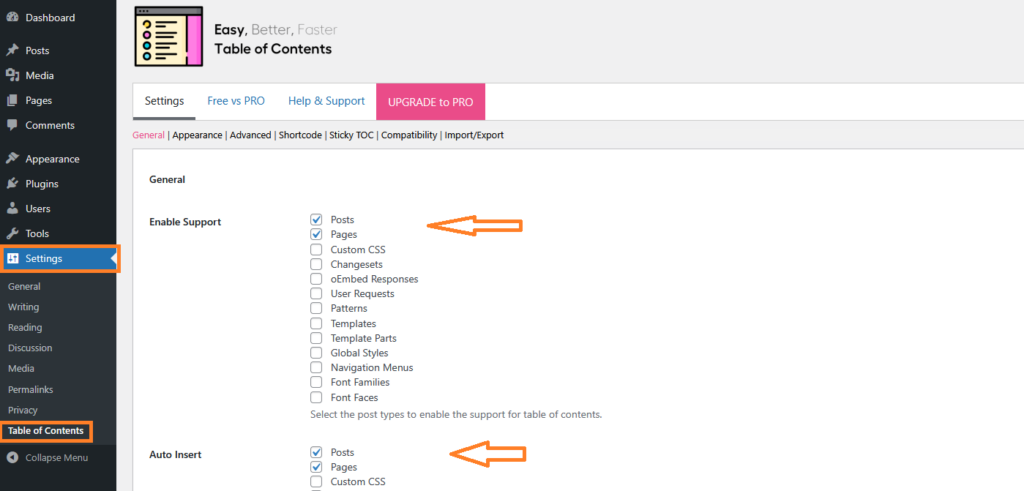
If you want the table of contents to appear only on specific pages or posts, and not on every page and post, you can simply uncheck the “Auto insert” on posts and pages option.
After unchecking save the changes, and the automatic table of contents will no longer appear on your post and pages.
Now, you need to insert a short-code into the post where you want to add the table of contents. The table of contents will only appear in the post after you insert the short code.
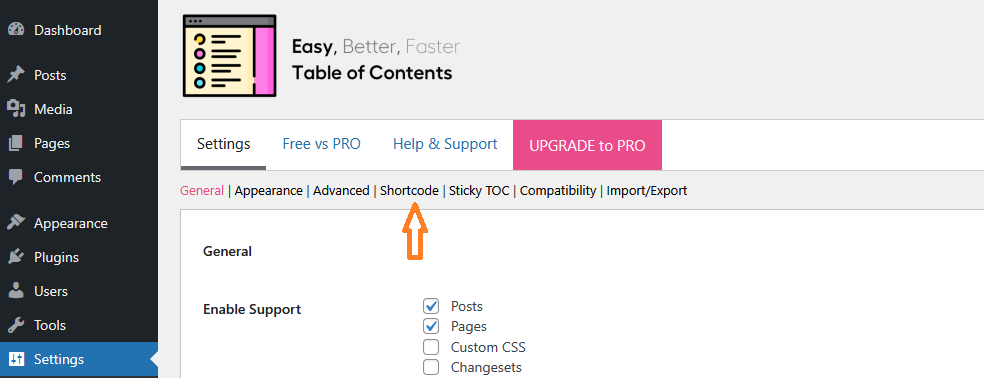
To get the short code go to Settings » Table of Contents » Shortcode
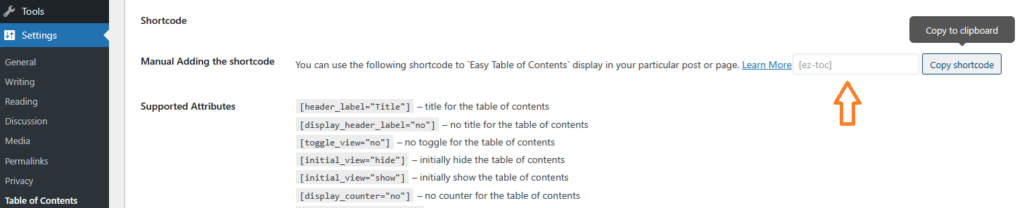
To manual adding the shortcode You can use the following shortcode to Easy Table of Contents display in your particular post or page.
Simply click on the copy shortcut and it will be copied automatically.
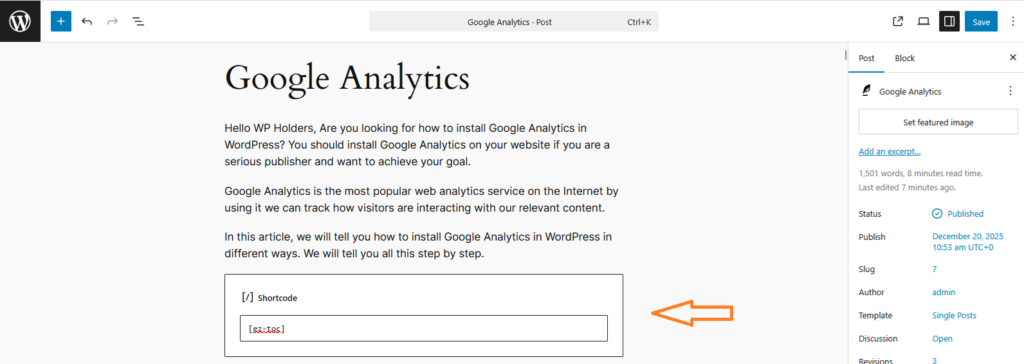
After copying the code, edit the post where you want to add the table of contents. Once you’re in editing mode, simply paste the code where you want the table of contents to appear and save the post.
Let me show you how to use shortcuts inside a post.
I am pasting a shortcut to the table of contents in the post about how to add Google Analytics.
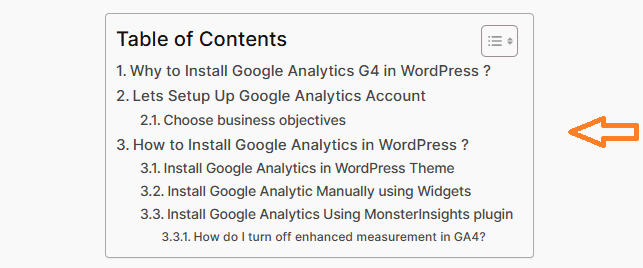
As you can see, the table of contents has been successfully added to my post. You can also add a table of contents to your posts or pages in the same way.
Method 2: Add Table of Contents Manually by Anchor Link
In this part of the article, we will show you how to create anchor links in WordPress using the Gutenberg editor. WordPress has a built-in feature that allows you to create a table of contents manually.
So let’s manually create a table of contents using anchor links.
Step 1: Create the Table of Content
Now, you need to create the Raw link that will take people to the anchor
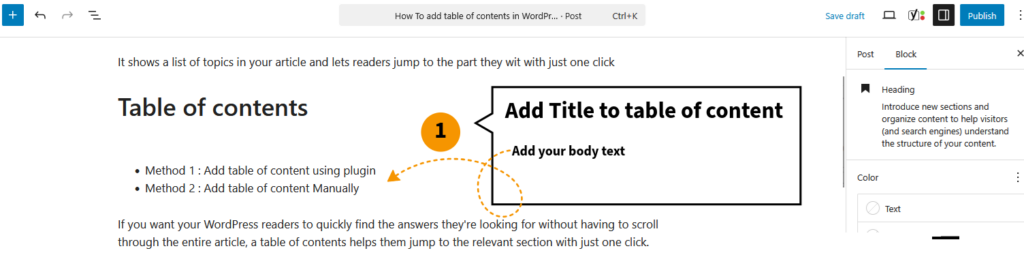
- Edit the post, Go to the part of the post where you want to create the link. It could be at the top of the page or post.
- insert a “Paragraph block” and title it accordingly, (as in below screenshot i gave name “Table of Contents”)
- Now, Create a list of raw links. (like we have created Method 1: Add table of content using plugin & Method 2 : Add table of content Manually )
Step 2: Set Up an Anchor Name
Now, Come to the Section where you want to send your users after they click on the link. You will need to give that section a specific name. You can do it like this.
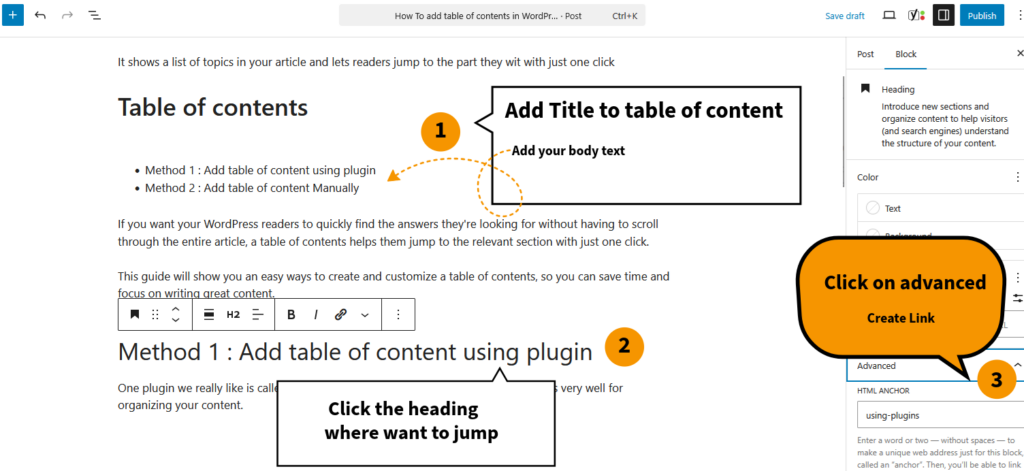
- Click on the heading (section) where you want the link to take people. It could be a text block or a heading.
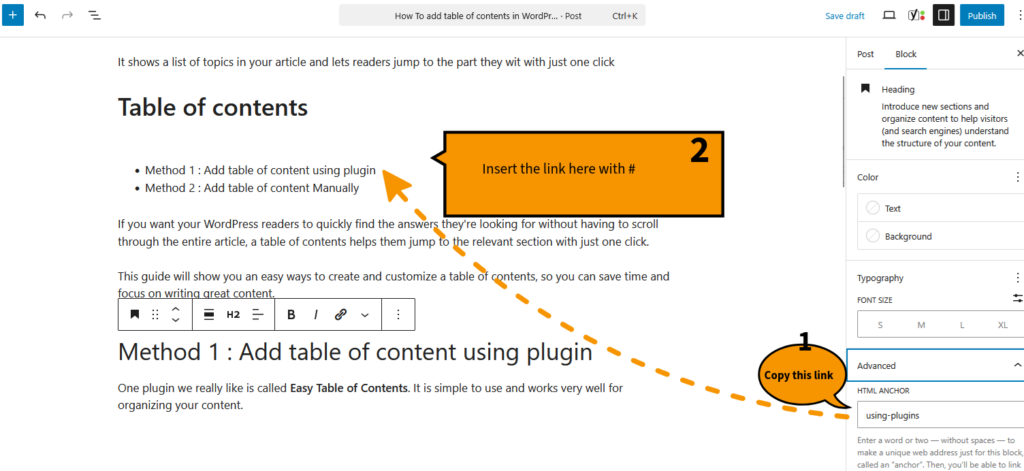
- On the right side of your screen, in the settings, find the “Advanced” section and click on it.
- You will see a box called HTML Anchor. This is where you write the name for the anchor.
For example, we want people to go to the “Method 1: Add table of content using plugin” section, we have type something like using-plugins.
Step 3: Insert The link
This is an important step, which is explained very well in the screenshot.
- Now, copy the text that was written in the HTML anchor box.
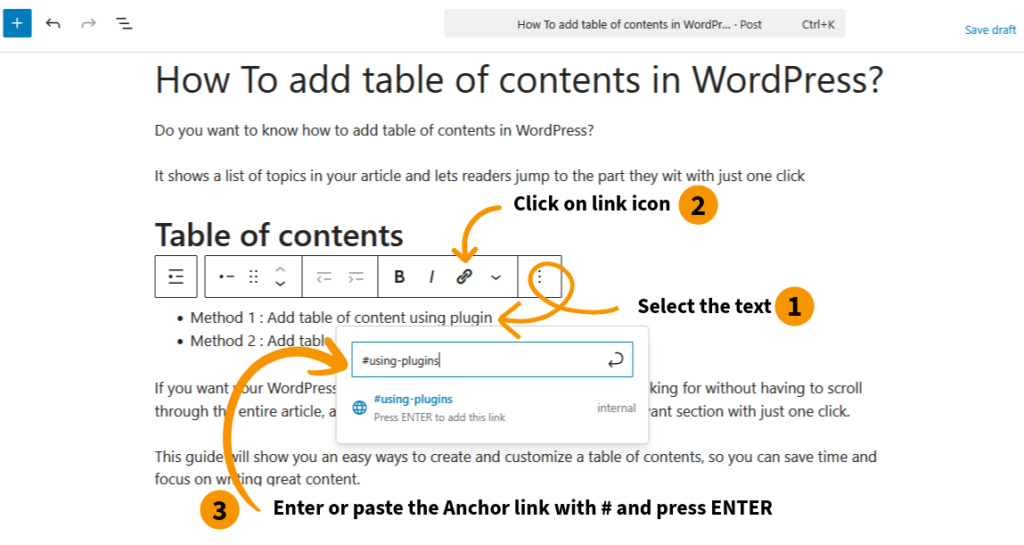
- Highlight the text you want to use as a link below table of contents.
3. Click on the Link icon in the toolbar (it looks like a chain).
4. In the link box, type # followed by the name you gave your anchor. For example, if you called your anchor using-plugins, you would type #using-plugins
5. After entering or pasting simply press ENTER.
Step 4: Save and Check It Out
After adding the link, make sure you save your page. Then, go to the live version of your website and click on the link to test it. If everything is set up correctly, the page will scroll to the section you linked to.