
Hello WP Holders, Do you want to download your entire WordPress media library from your website server to your local computer?
In WordPress, when you upload an image, video, or file to your website, it goes into the Media Library.
you might be migrating your website to a new host, or you may simply want to keep a backup copy of your important media files.
In this article, we will show you different ways to download your WordPress media library.

Why to download media library?
As you know, Your website’s media library contains all the images, videos, audio, and documents that you have uploaded to your site.
Exporting your website’s media library on your computer has many benefits. If your website is hacked or stops working, you will still have a safe copy of your media.
It also helps when you move your website to a new hosting service.
How to download Entire Media Library?
There are several ways to download your entire WordPress media library. You can choose the method below that works best for you.
Download WordPress Media Library Using FTP (FileZilla)
To download the Media Library, we use something called FTP, which stands for File Transfer Protocol. FTP helps us transfer files between a website and a computer.
One of the most popular and free FTP tools is FileZilla.
Before starting, make sure you must have:
- FileZilla Client is installed (if not, Download and Install it)
- FTP details (Host, Username, Password)
- Internet connection
You can obtain all your FTP login credentials from your hosting account.
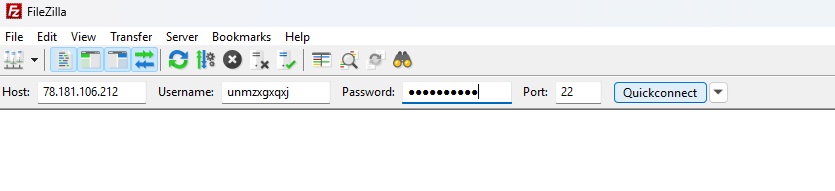
Install FileZilla Client on your computer, then open it. Enter the FTP details in the Host, Username, Password, and Port fields at the top of the screen, and then click the Quick connect button.
Port will be 21 or 22
If the details are correct, FileZilla will connect to the website. On the right side of the screen, you can see the website’s files, and on the left side, you can see the files on your computer.
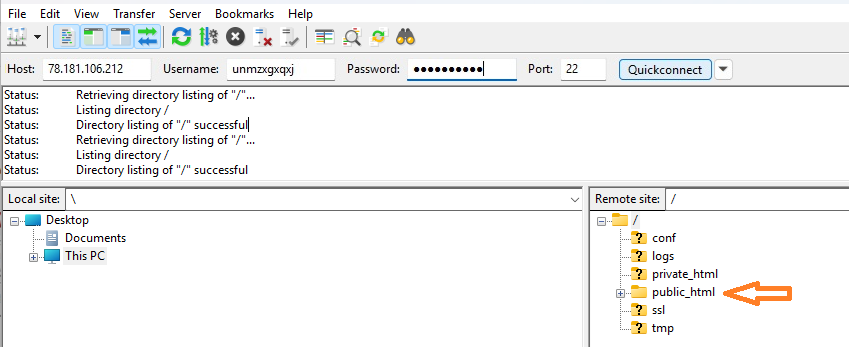
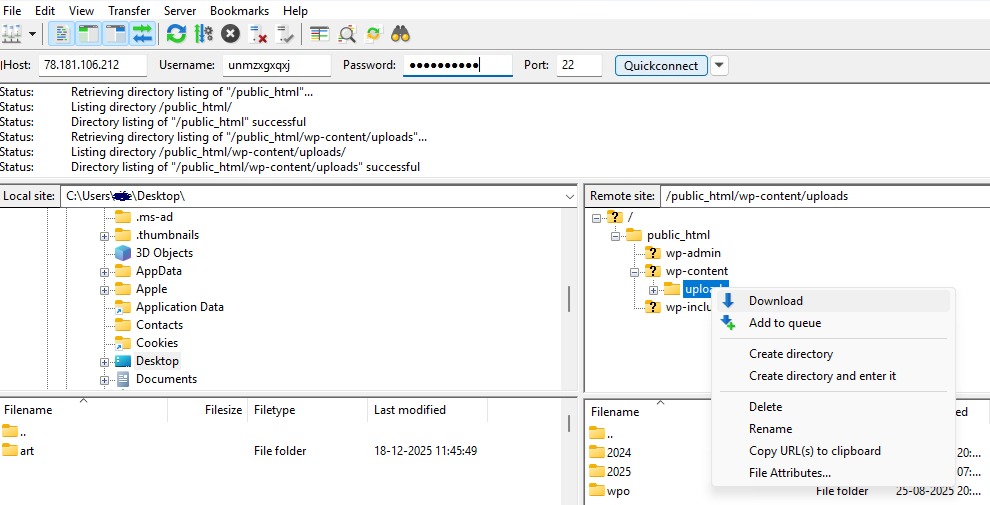
To find the media library, in FileZilla, open the public_html folder on the right side, then open wp-content and then click on uploads.
To download the Media Library, select a folder on our computer (left side of filezilla) where you want to save the files. Then right-click on the uploads folder (right side of filezilla) and choose the download option.
After Click on download, FileZilla starts copying all the media files from the website to the computer.
The download may take some time if the website has many images and videos. Once the download is complete, all the Media Library files will be saved safely on you computer.
Download WordPress Media Library Using cPanel
What is cPanel? cPanel is like a control room for a website. It helps us manage the website’s files, emails, and settings. Using cPanel, you can find these files in one folder and download them in just a few steps.
However, it is Remember that not every hosting provider offers cPanel, so this method will only work if your hosting account includes it.
Let’s Get Started,
Step 1: First, Log in to your hosting account. For instance, I am using BigRock, but don’t worry if you are using a different hosting service; the steps are almost the same.
Step 2: Simply, Click on cPanel Icon

Step 3: When cPanel opens, you will see a folder called file manager under files. click on it.
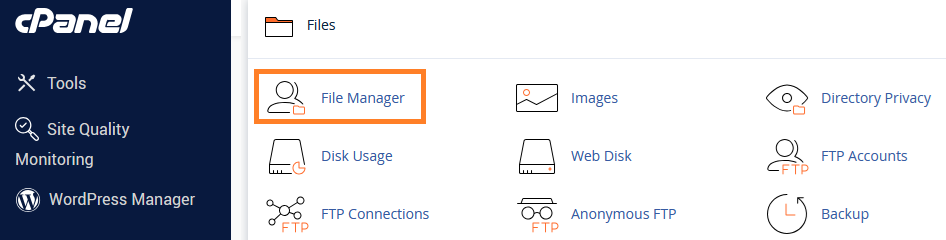
When you click on file manager, you’ll see the following screen.
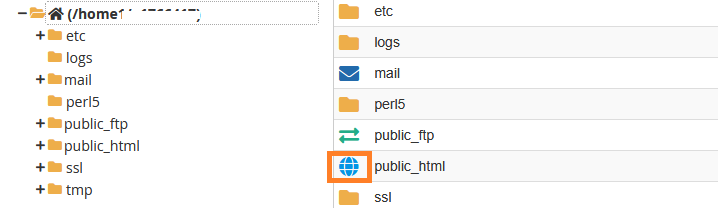
Step 3: Now, Double-click on the globe icon next to public_html.
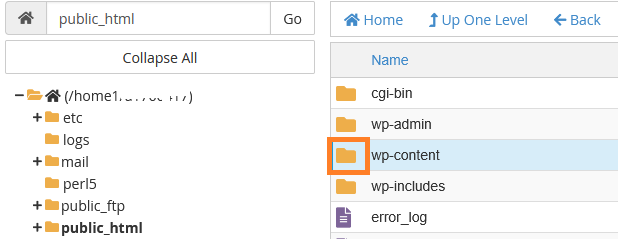
Step 4: Inside the public_html folder, you will get the wp-content folder. Double-click on it.
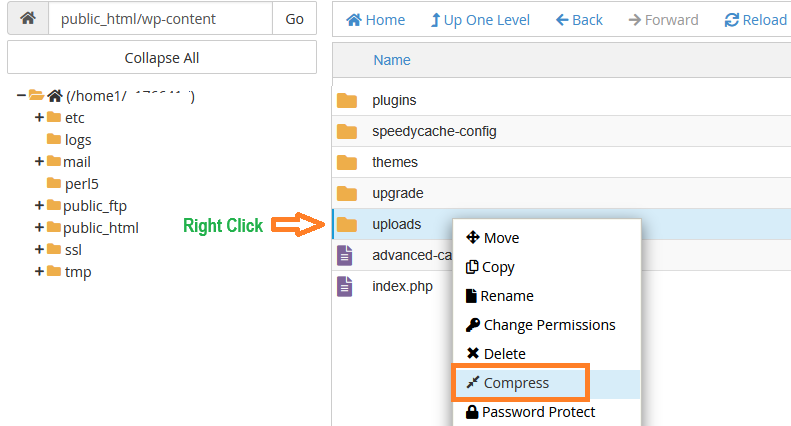
Step 5: Inside the “wp-content” folder, locate the “Uploads” folder, right-click on it, and then click “Compress” button.
Note: if you are getting download button without compress click on download.
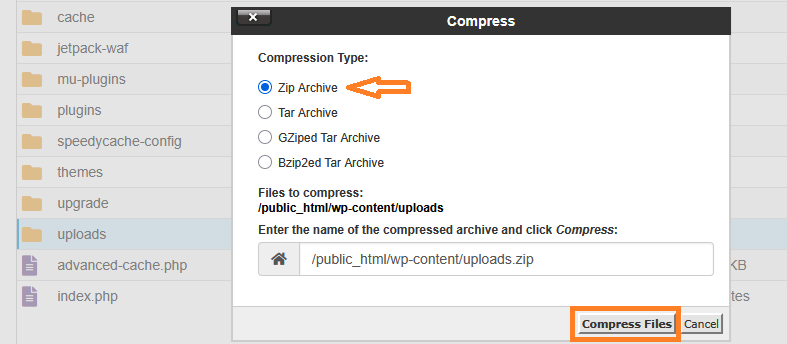
Step 6: As soon as you click “Compress” a pop-up screen will appear asking you in which format you want to download the files.
To download in ZIP format, select ZIP and then click “Compress Files.” In a short while, the uploads folder will be ready for download in zip format.
When compression is finished close the compression results popup box.
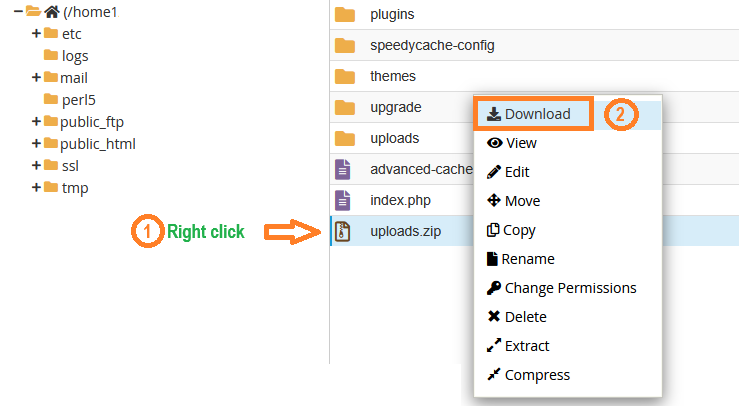
Step 7: Now, a folder named “uploads.zip” will be created. Simply right-click on it and then click on download.
The download will begin. Once it’s complete, open the ZIP file on your computer.
That’s it, All your WordPress images and files are now saved on your computer.
Important Notes
- Downloading large Media Libraries can take time depending on the number of files and their size.
- Be careful not to delete any files from cPanel, as this can break your website.
Download WordPress Media Library Using Plugin
The first thing you need to do is install and activate the UpdraftPlus plugin. For more information, please see our guide on how to install a WordPress plugin.
Once you activate the UpdraftPlus plugin, you will see the UpdraftPlus option under Settings in your WordPress admin area.
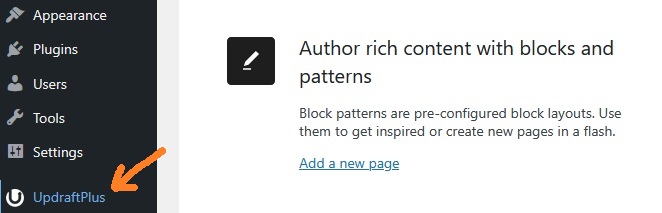
Go to UpdraftPlus » Backup/Restore and simply click the Backup Now button.
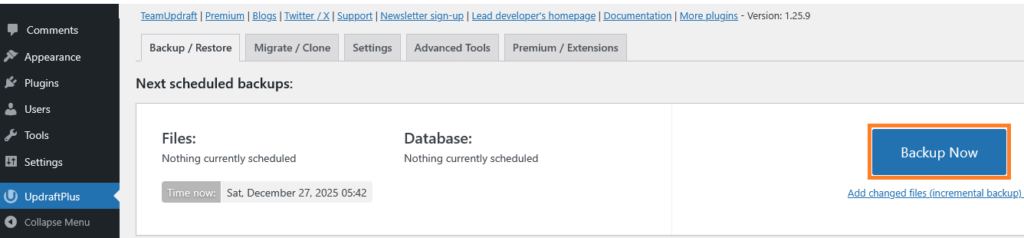
After Clicking on the Backup Now button, you’ll get a pop-up screen.
Now, check the box next to “Include your files in the backup” and click the three dots (…) to show the settings. Since we want to download the media library, only check the box next to ‘Uploads‘ and leave the rest unchecked.
Next, you can click on the ‘Backup Now’ button.
You can now see the Backup you have created under Existing Backups, Click the ‘Uploads’ button against the respective backup.
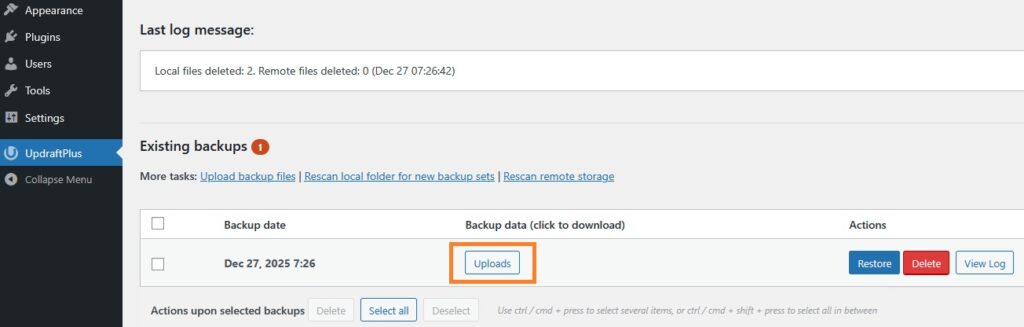
After clicking the ‘Uploads’ button, you will see this screen.
Your media library folder is now ready to be downloaded to your computer. Simply click on ‘Download to your computer’ button.
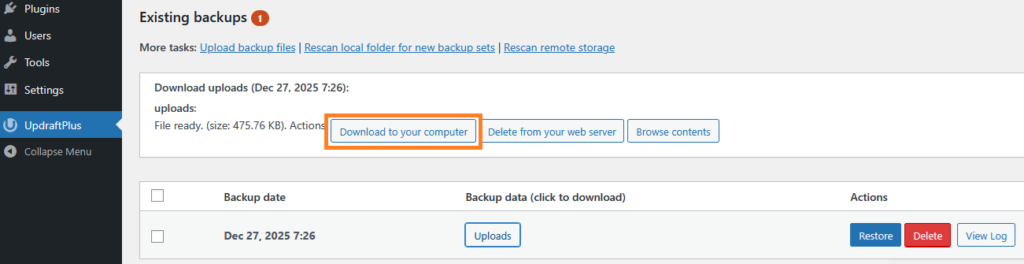
Doing this will import all the media files from your WordPress website to your local computer in a zip format.
Now, extract the downloaded zip file, and you will get your media library.
Export WordPress Media Library Using Admin Dashboard
Using WordPress Admin Dashboard is one of the easiest way to Export WordPress media files.
You can Export your media Library using the Built-in Export/Import feature in Admin Dashboard inside WordPress by following the below steps.
Note: It is recommended to use this method only if you have an active website that you might want to migrate from one host to another. DO Not use if your website is down or not operational because it will not work in that case.
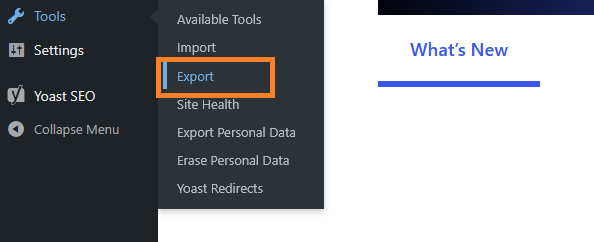
Navigate to WordPress dashboard, and Go to Tools » Export
Since we want to download media files, make sure you select the “Media” option, and then click on “Download export file”.
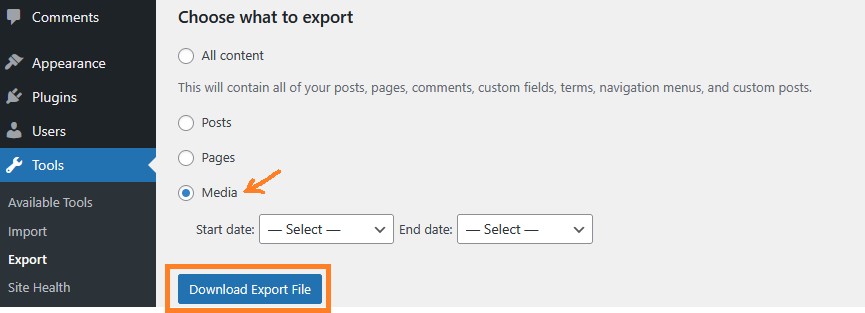
The system will now download your file in XML format. Simply go to the website where you want to import your media files.
In order to Import the Files you will need to use the Import Feature Tools » Import.
Thank You for Reading 😊
If you face any difficulties or confusion at any step, don’t worry. Simply write your question in the comments section, and we’ll be happy to assist you.