Hello WP holders, are you looking for a way to install a WordPress plugin to add a specific feature to an existing WordPress website?
When it comes to WordPress security, WordPress optimization, Search engine optimization (SEO) or adding any other feature, WordPress plugins are needed.
So you must have realized how important WordPress plugins are for running a good website. So let’s install the WordPress plugin as per your requirement.
Today in this article we will tell you how to install WordPress plugin and in which ways we can install WordPress plugin, we will tell you all this step by step.

How to Install WordPress Plugin
Installing a WordPress plugin is very easy like installing apps in mobile. WordPress plugins can be installed in different ways. We will learn about three methods. You can install WordPress plugin in any of these ways.
Methods
Following are three ways to install WordPress plugins. Install the plugin using the method that is easiest for you.
- Install WordPress Plugins from Dashboard using plugin directory
- Install WordPress Plugins Using Upload From Dashboard
- Install WordPress Plugin Manually using FTP (Filezilla)
1
Install WordPress Plugins from Dashboard using plugin directory
The easiest and best way to install a plugin is to search in the WordPress plugin directory. For this you do not need to go anywhere else, it is done directly from the plugin dashboard.
So let’s install the plugin by searching directly from WordPress dashboard
To install plugin, first login to WP and go to Plugins » Add New Plugin » Search Plugins from dashboard
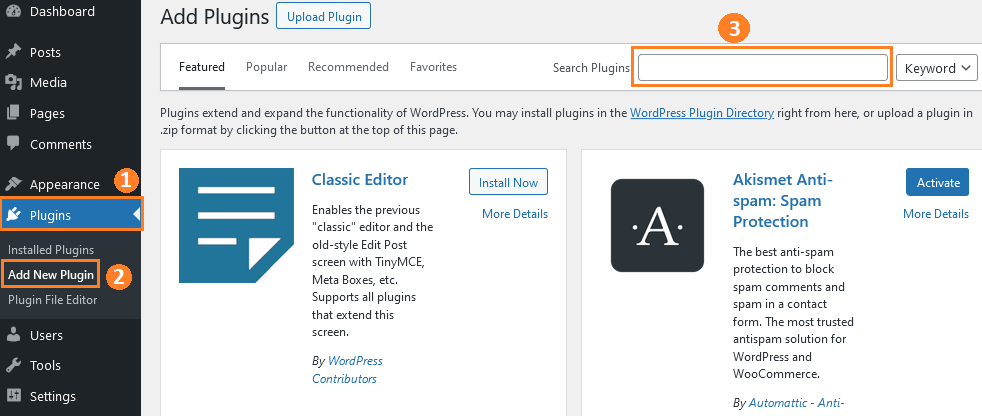
As you can see in the above screenshot, the plugin search option is given Whatever app you want to install, ‘Enter its name in the search box‘.
To enhance search, You can select Keyword, Authors, Tags option from the drop down menu next to the search plugin box.
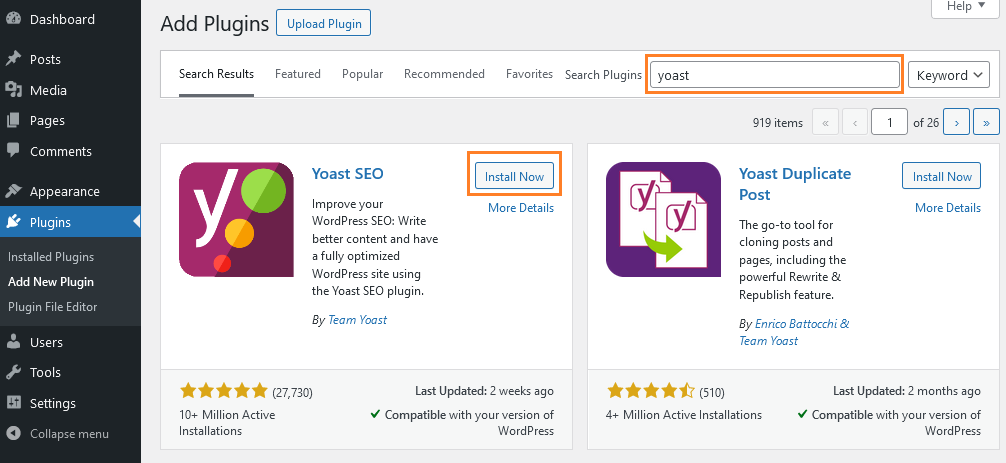
For example, I am going to install yoast plugin by typing yoast in the search box as you can see in the below screenshot I got the plugin now what you need to do is click on the ‘Install Now‘ button
Clicking on install now, the processing will start and the plugin will be installed in a short while. Once installed, you will get the option to activate it as shown in the image below.
Then just click on the ‘Activate’ button or you can activate later from the installed plugins
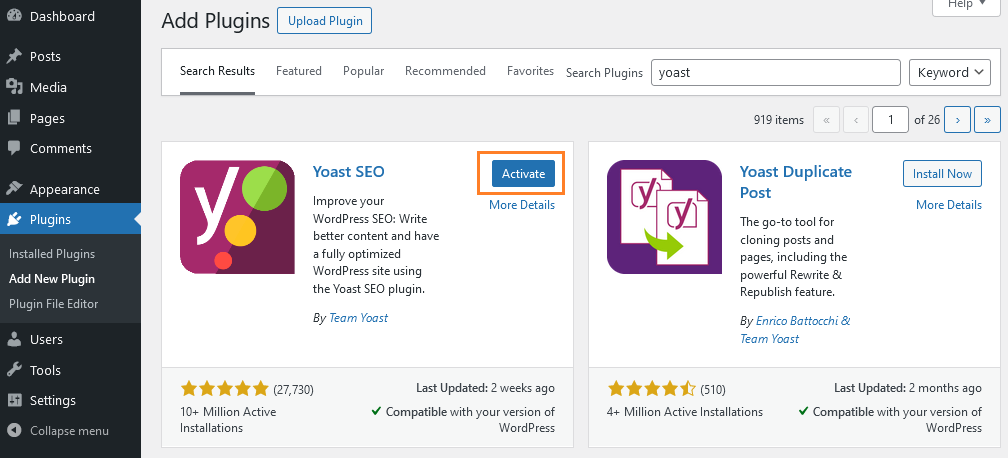
The plugin has been activated. You can also install it the same way as I have done. You can install it by searching the name of your plugin instead of yoast.
Now let’s try to install the plugin in another way
2
Install WordPress Plugins Using Upload From Dashboard
If you have a plugin in .zip format then it can be uploaded directly to WordPress. Usually paid WordPress plugins are not listed in the WordPress plugin directory. Then this method is used
Both free and paid versions can be installed using this method. But the plugin must be in a zip file.
To upload a plugin, first login to WordPress and go to Plugins » Add New Plugin » Upload Plugins from dashboard
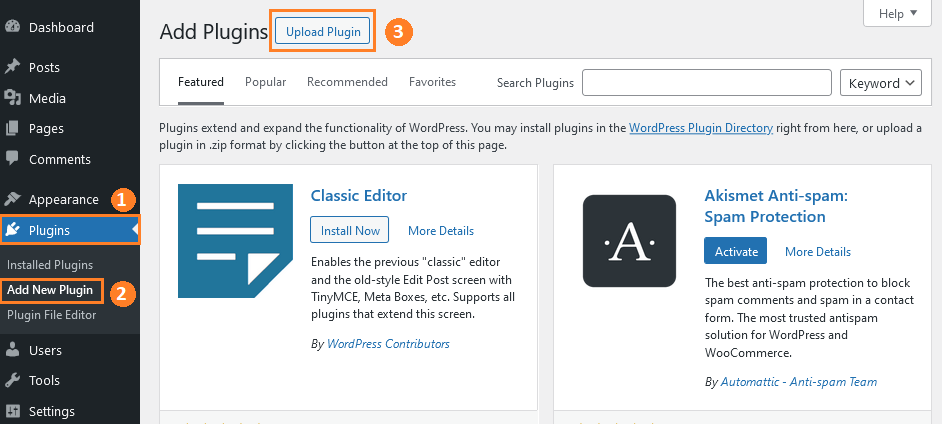
As soon as you click on the upload plugin, you will get the option to select the file simply click on ‘Browse’ a popup will open to locate zip file from your computer
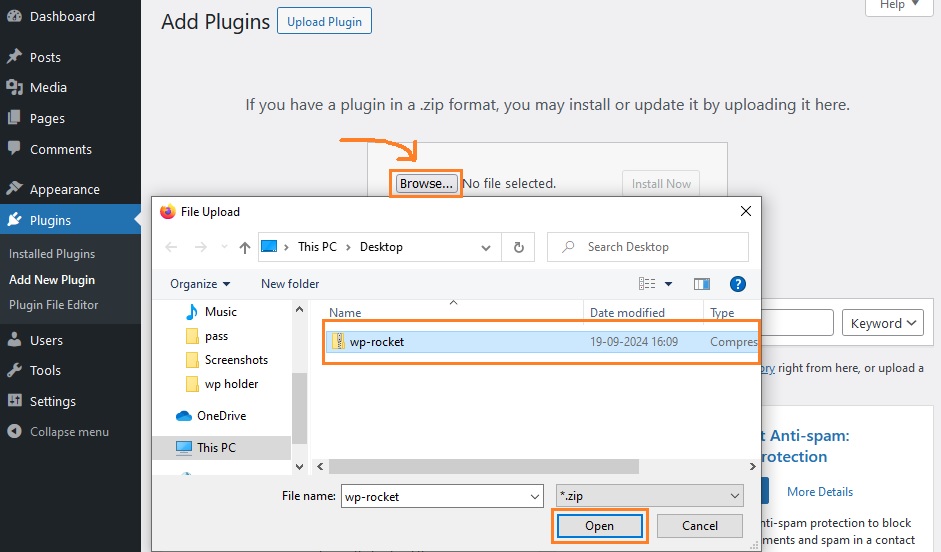
Now select the plugin file which you have recently downloaded on your computer and click on ‘Open’. For example here I am selecting wp-rocket zip file which is saved on my desktop.
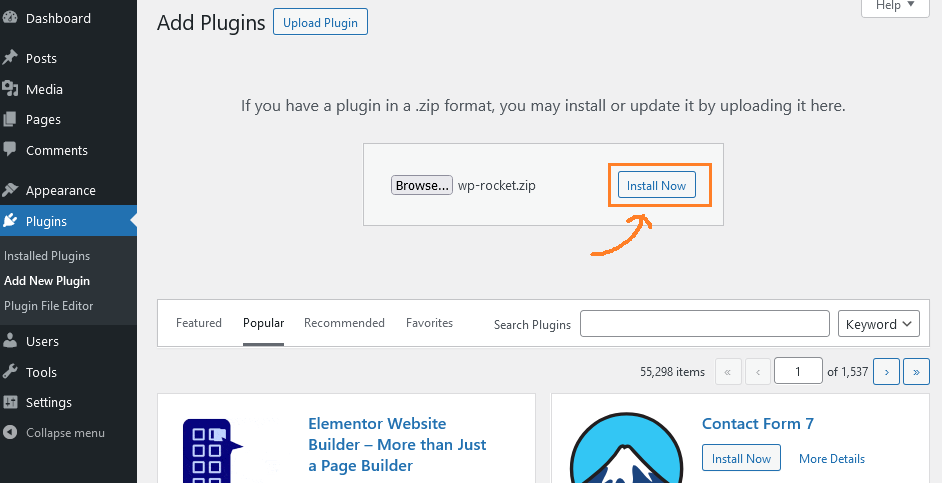
After successfully selecting the file, you just need to click on the ‘Install Now’ button It will take a little while for WordPress to upload and install the plugin file from your computer
In the meanwhile you can have a sip of coffee
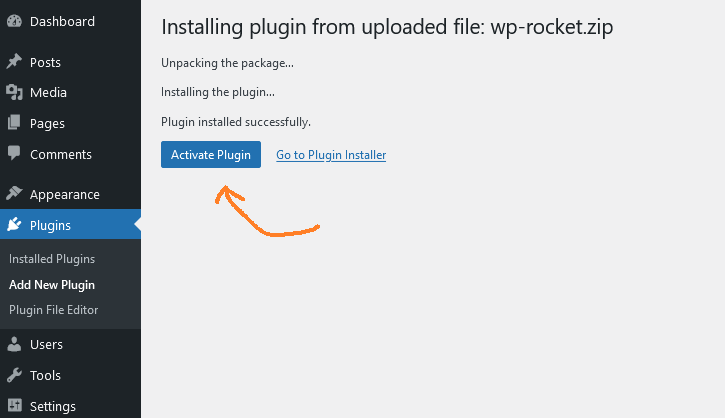
Now you will see that the plugin has been successfully installed, Click on ‘Activate Plugin’ button if you want to activate the plugin.
You can also activate it later by going to Installed Plugins
We have tried to install the WordPress plugin in two ways. Now let’s try to install it in the final third way.
Check Out : How to Import Large WordPress Database
3
Install WordPress Plugin Manually using FTP (Filezilla)
Sometimes you may fail to install a plugin from the WordPress dashboard or the hosting provider may have file restrictions or the user may have any other issue that prevents installing a plugin directly from the WordPress dashboard.
So in this case we can install plugins using this method, may not be easy for beginners but still you can do it, we will discuss it step by step in a simple way.
You must have FileZilla FTP client installed on your computer before starting it.
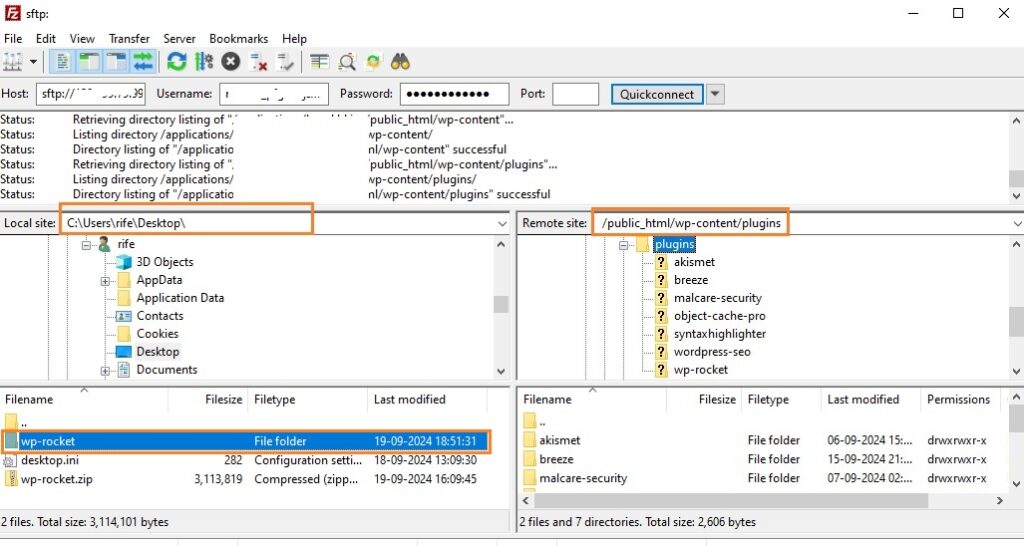
Now unzip (Extract) the download plugin file on your computer, Now login to Filezilla using login credentials, after login we have to upload file to public_html/wp_content/plugins
At remote site Go to ‘public_html/wp_content/plugins’
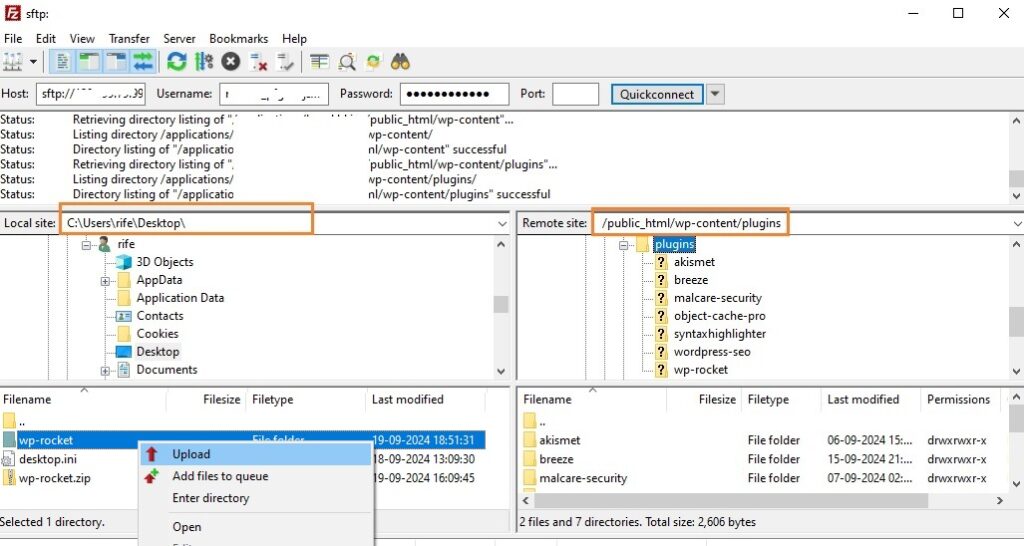
Now Right Click on you plugin folder as shown above in screenshot then click on upload button Filezilla will now upload the plugin files from your computer and install it for you.
Once the uploading is complete, you can activate the plugin by going to your WordPress dashboard
To Activate plugin go to ‘Plugins » Installed Plugins’ From the list of plugins you can activate the plugin you just uploaded.
Thank you for Reading this article enjoy your time.