Are you a Beginner Trying to Add a New Post in WordPress? Do you want to learn How to Create a New Blog Post in WordPress using all the features the WordPress Block Editor have tucked in there neatly. Then you are at the Right Place.
Creating a New Post Sometimes Feel overwhelming as a beginner. Even the People who are a Pro at using WordPress struggle to Find The Right Features and their true use at the Post Edit Screen.
In this Article We will cover everything from Adding a New Post, the title, images, categories, tags, slugs and everything you need to make an excellent post for your blog.

Creating a New Post in WordPress Default Editor
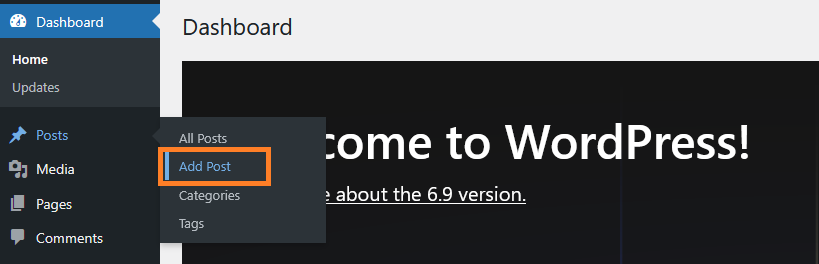
To create a new blog post in WordPress, Simply open your WordPress Dashboard and Go to Posts » Add Post.
Doing this will open the Gutenberg, a block-based editor with a lots of features inside it. Below we will guide you about all the features so you make an excellent first post on WordPress.
1. Add Title and Content Block
The title and content blocks are really important for your Blog SEO. Adding a suitable title will help your content reach the right type of audience or vice versa.
The Title and Content block appear automatically when you open the visual editor in WordPress. You will see the ‘Add Title’ field on the top of your screen. Add any title of your choice.

To add content you need to add a block. If you wish to enter a paragraph you can start writing your blog right away.
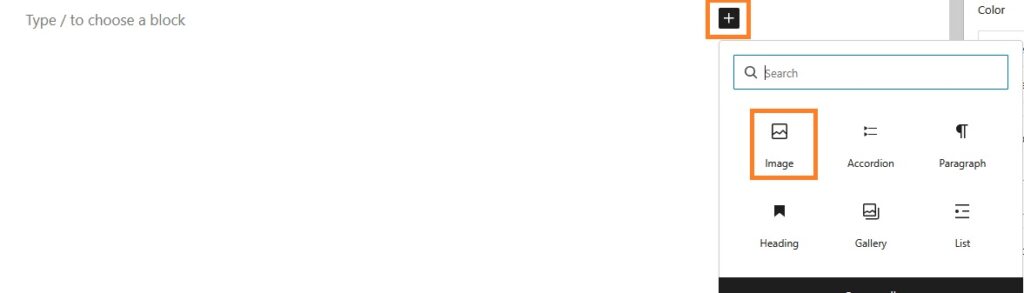
To Add a new block, click the‘+’ icon on the right or Type / to search and choose a block.
WordPress has blocks for all major content items including Paragraphs, Headings, Images, Tables, Columns, Short codes, Galleries, Embeds and Many more. There are blocks which are specifically designed to embed third-party content as well.
You can also transform the content from a Paragraph to a Column, Heading or a Quote by using the block icon button. Click on the Paragraph you want to transform and then select the content option as you like.
2. Add Image
You can add an image to your post easily. Just add an image block and then upload or select the image you want to add.
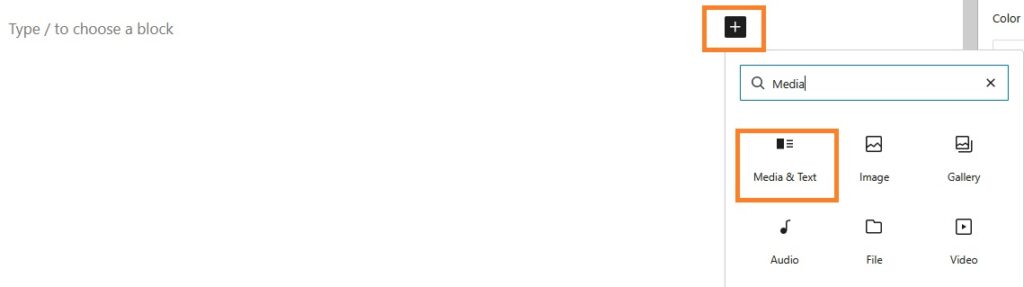
You can use ‘Media & Text‘ block if you want to use picture and text next to each other. This will help you wrap text around the images in your post on WordPress.
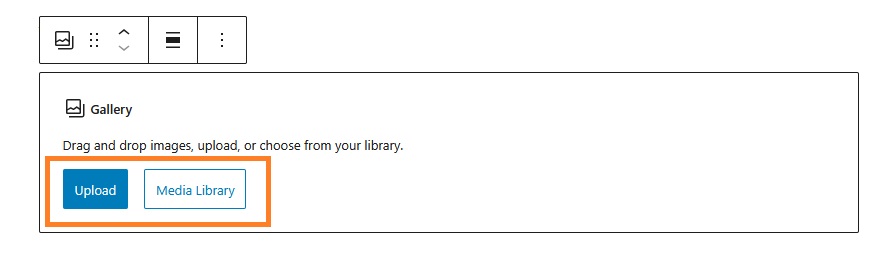
You can also add images and columns in a grid layout with the help of Gallery block that comes with WordPress Editor.
You need to add a Gallery block and upload or select images from your WordPress media library.
3. Add Video or other media
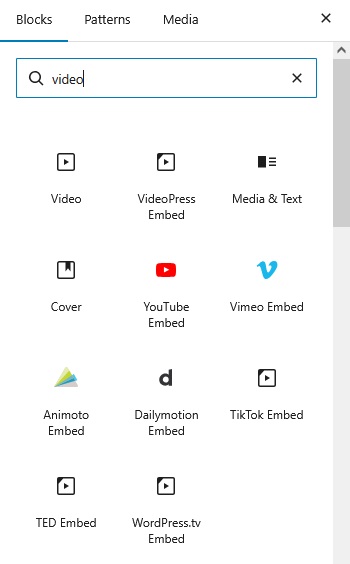
Do you want to upload a video in your post? You can certainly do that as the default WordPress editor comes with embed block for almost all popular video platforms.
Click on add block icon (+) given on the right and search video and all the options will appear on screen. choose one that works for you.
You can also simply copy and paste the URL of the video you want to Embed into a paragraph block.
WordPress will convert it into a video embed block by itself.
However, we do not recommend using the video block to directly upload the videos to your blog or website. As it will reduce the speed of your website and can even crash your hosting server at WordPress.
We always suggest uploading your video on any service first like youtube or vimeo and then embed it in WordPress Posts.
4. Add Categories and Tags
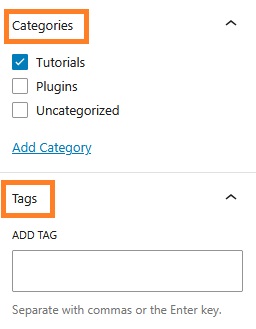
You can sort your posts into categories and tags on WordPress. This help you organize your content into different sections and topics for improved clarity.
Sorting and organizing your posts not just improve you WordPress SEO but also help your users to find the content they are looking for.
The categories and tags options appear on the right-hand column of your screen.
5. Adding a Featured Image
A featured image is the main image of a post that represent what the content is about. These are usually shown on the single posts, blog archive pages and homepage of your website.
You can set a featured image for your post from the option given in right-hand column.
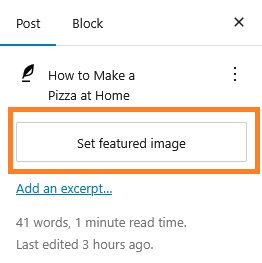
Just click on ‘Set featured image’ button and then you can upload you want to set as featured image or select one from the media library.
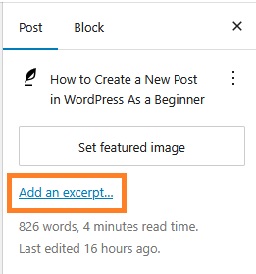
6. Add Excerpt
Excerpts is the summary of your blog post. Generally, WordPress themes generate the excerpt automatically from the first few lines of your post.
But this automatic version of excerpt is not usually accurate or meaningful. So, you may want to change and manually add an excerpt.
You can manually add an excerpt with the help of excerpt box which is located under the settings column on the right hand side.
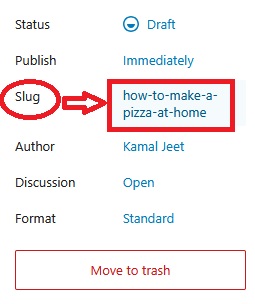
7. Change Permalink or Post URL Slug
Permalink and post URL slugs are an important part of WordPress SEO which help increase the post’s ranking on the search engines.
By Default, WordPress use the post’s title to generate the post URL. You may want to change the Post URL to make it more SEO friendly.
You can change or edit the post URL simply under Settings given in right hand column in WordPress visual editor.
Just click on the slug in blue, make required changes and then close the box as shown below.
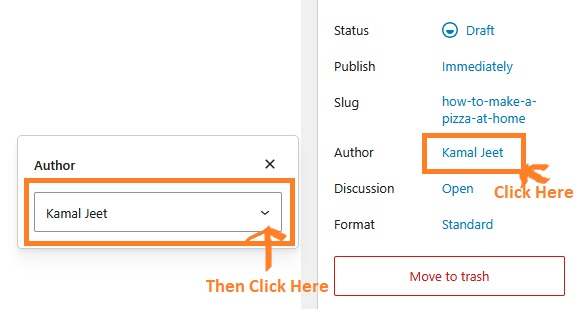
8. Change Post Author
If you run a website where there are more than one contributors, you may want to change the author.
WordPress takes the author by default when you create a new post. But if you want to change it, you can do so under the settings on the right.
Click on the default author and assign a new author from the drop-down menu over there.
WordPress Post Publishing Options
Now that we have learnt how to create a post in WordPress, Lets understand the publishing options available and how it works.
The WordPress post edit screen is divided into two columns. The left column is where we write content and the right column has all the settings which includes publishing options.
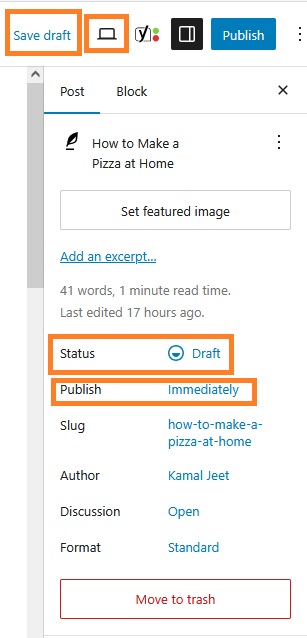
1. The ‘Save’ button will allow you to save the changes you have made to your post. If your post is in draft stage, the save button will appear as ‘Save draft’ on the right side of your screen.
2. The ‘Preview’ button is located next to the save button. It will open a live preview of your post in a new browser tab.
3. The ‘Status’ Button will show the current status of your post, whether it is a draft, pending, private, scheduled or a published post.
4. When you are done writing and editing your post, you can click ‘Publish’ button on the top of the right side. If you do not want to publish a post immediately, you can choose a desired date and time and schedule it.
To Delete a Post or Article, you can click on ‘Move to trash’ and it will be sent to trash folder. Deleted post will remain in the trash folder for upto 30 days. After that, it will be deleted permanently.
We hope this article helped you to learn how to create a new WordPress post as a beginner. If you still have any questions, you can ask us in the comment section below.